
Restoration and whitening of a Panasonic FS-A1ST
Posted by Javi Lavandeira in Hardware, How-to, MSX, Technology | May 08, 2015I posted about this on my Facebook account a few days ago and several people asked for more photos and a followup, so here it is.
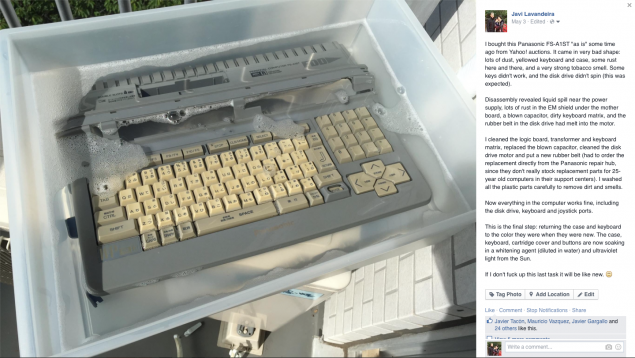
My Facebook post from May 3rd.
Background
Some time ago I bougth a Panasonic FS-A1ST computer on Yahoo! Auctions. The description said that the unit was “as is” and that it wasn’t guaranteed to work properly. The photos were a bit dark, but there wasn’t any obvious physical damage. The price wasn’t high, so I bid on it and I won.
The package arrived a few days later. I couldn’t wait to open the box and try it (I had been without an MSX turbo R for quite a while), but my happiness vanished quickly: the computer came in a terrible shape. It was very dusty, and both the case and keyboard had yellowed a lot, not to mention the tobacco smell.

The computer as it arrived. Because of the bad light it doesn’t look as bad in the photo as it did in real life.
Disassembly revealed that the situation was even worse: liquid spill near the power supply, lots of rust in the EM shield under the mother board, a blown capacitor, dirty keyboard matrix, and part of the rubber belt driving the disk drive had melted into the motor. Fortunately, the damage hadn’t seriously affected the logic board. Only the internal battery connector was affected, and the rest was just dust (lots of it).
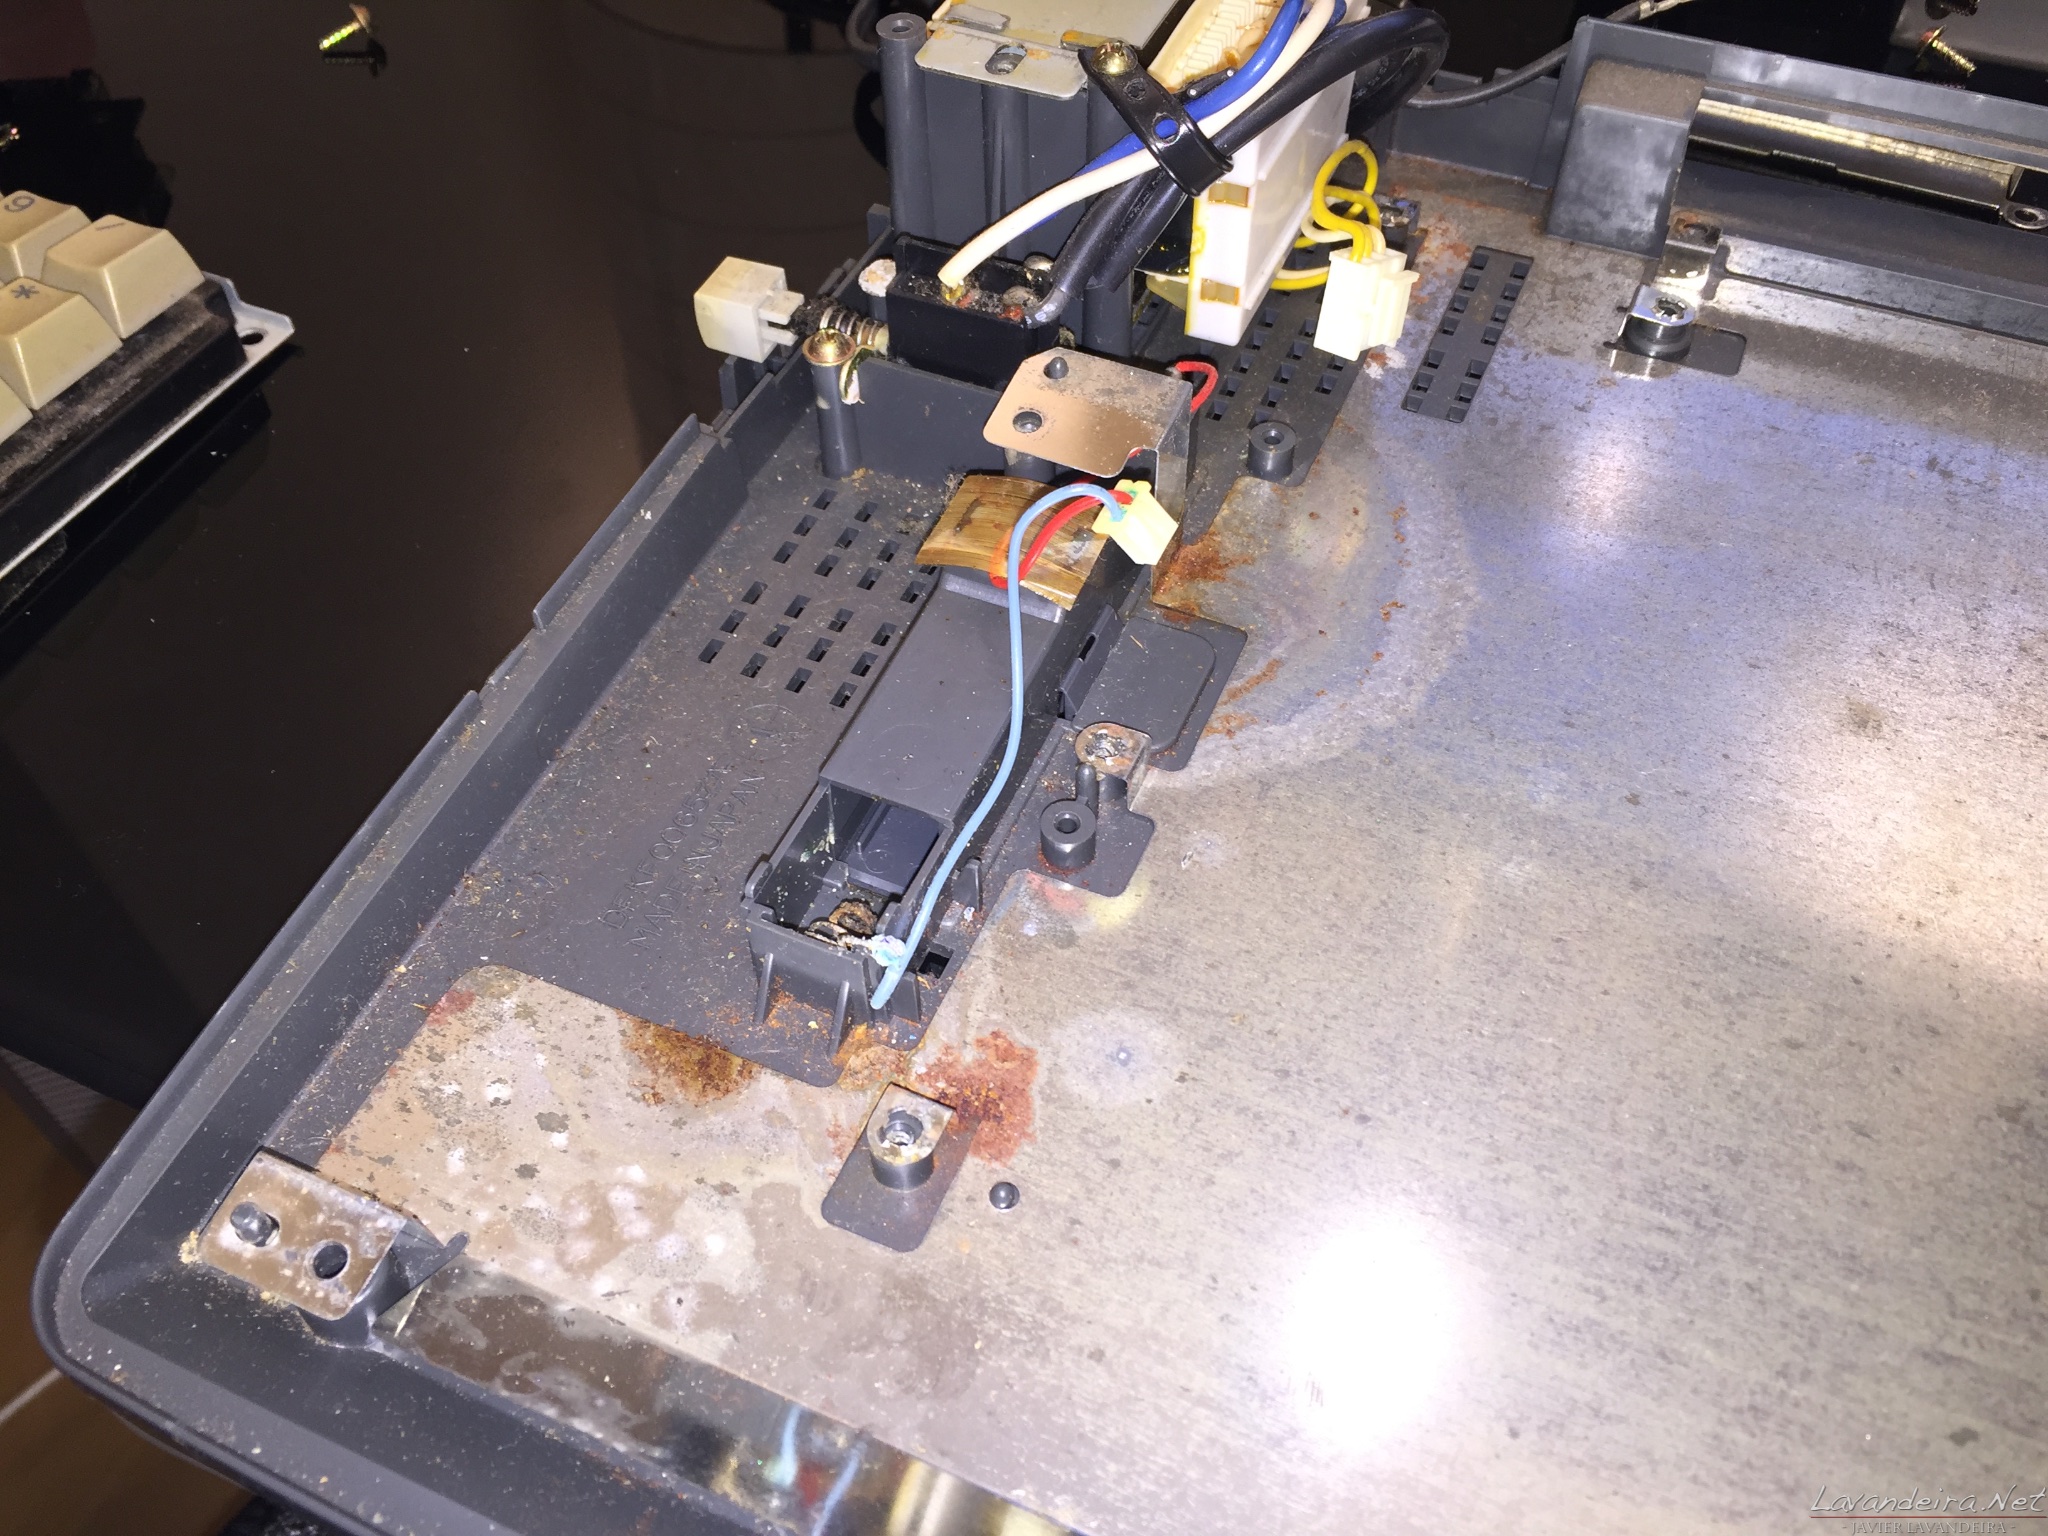
EM shield showing rust caused by liquid spill. Battery contacts and connector are beyond repair and need to be replaced.Click to enlarge.
Remains of rust from the EM shield and damaged battery wires and connector. Click to enlarge.
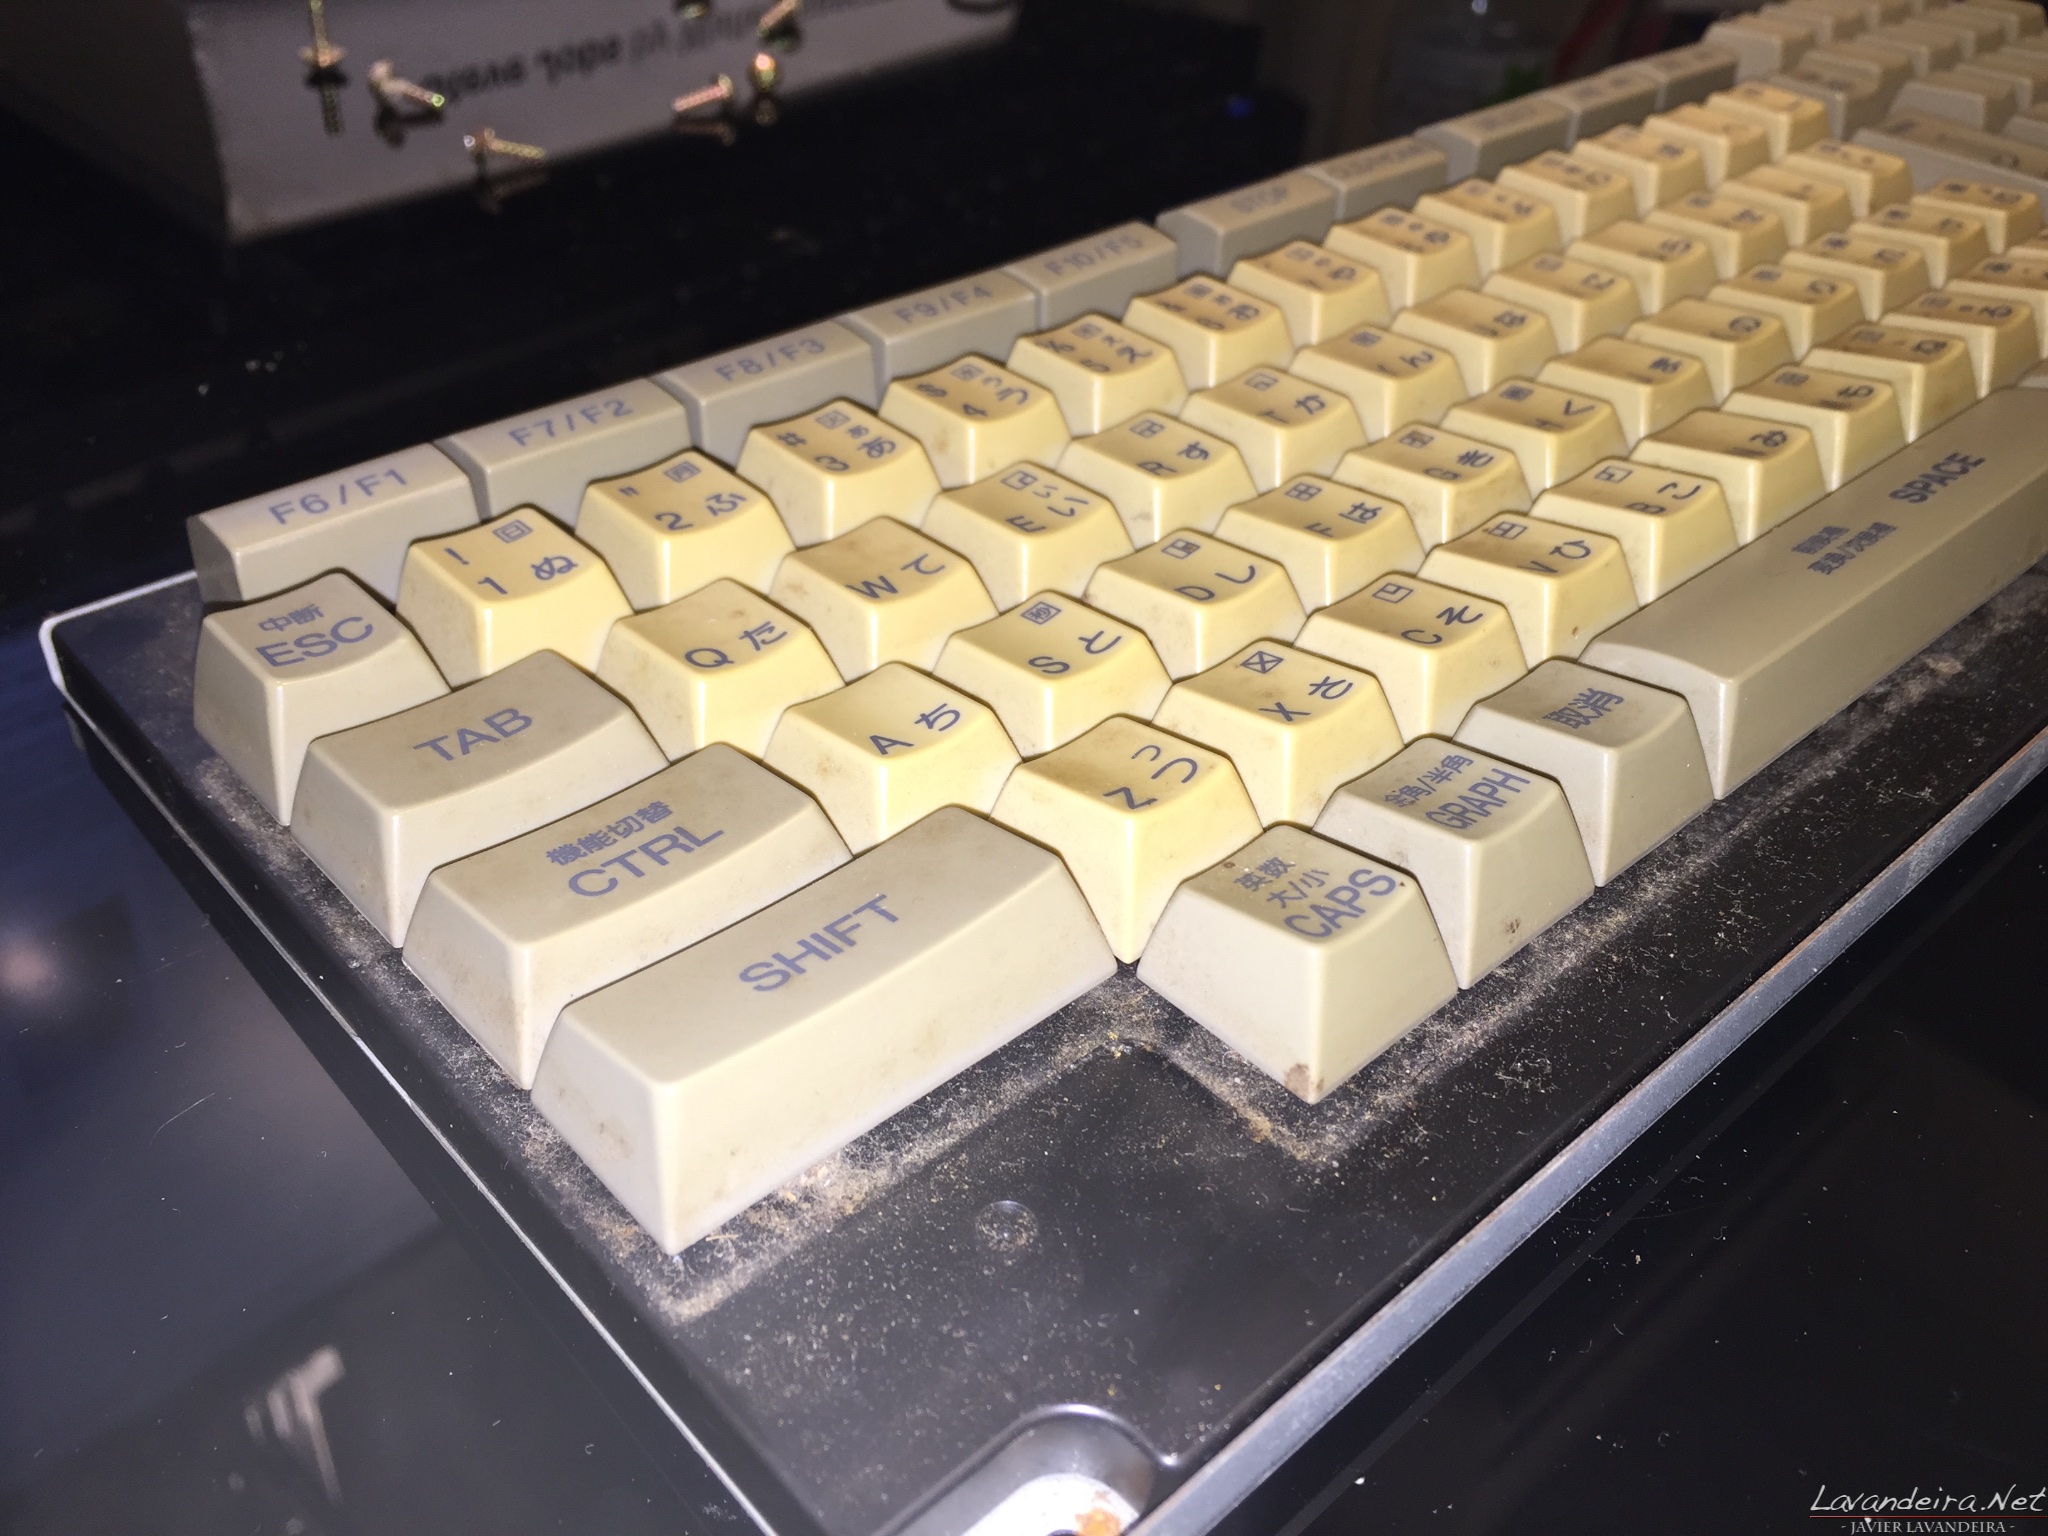
Very dirty and dusty keyboard. It doesn’t look too yellow in this photo because of the camera flash. Click to enlarge.
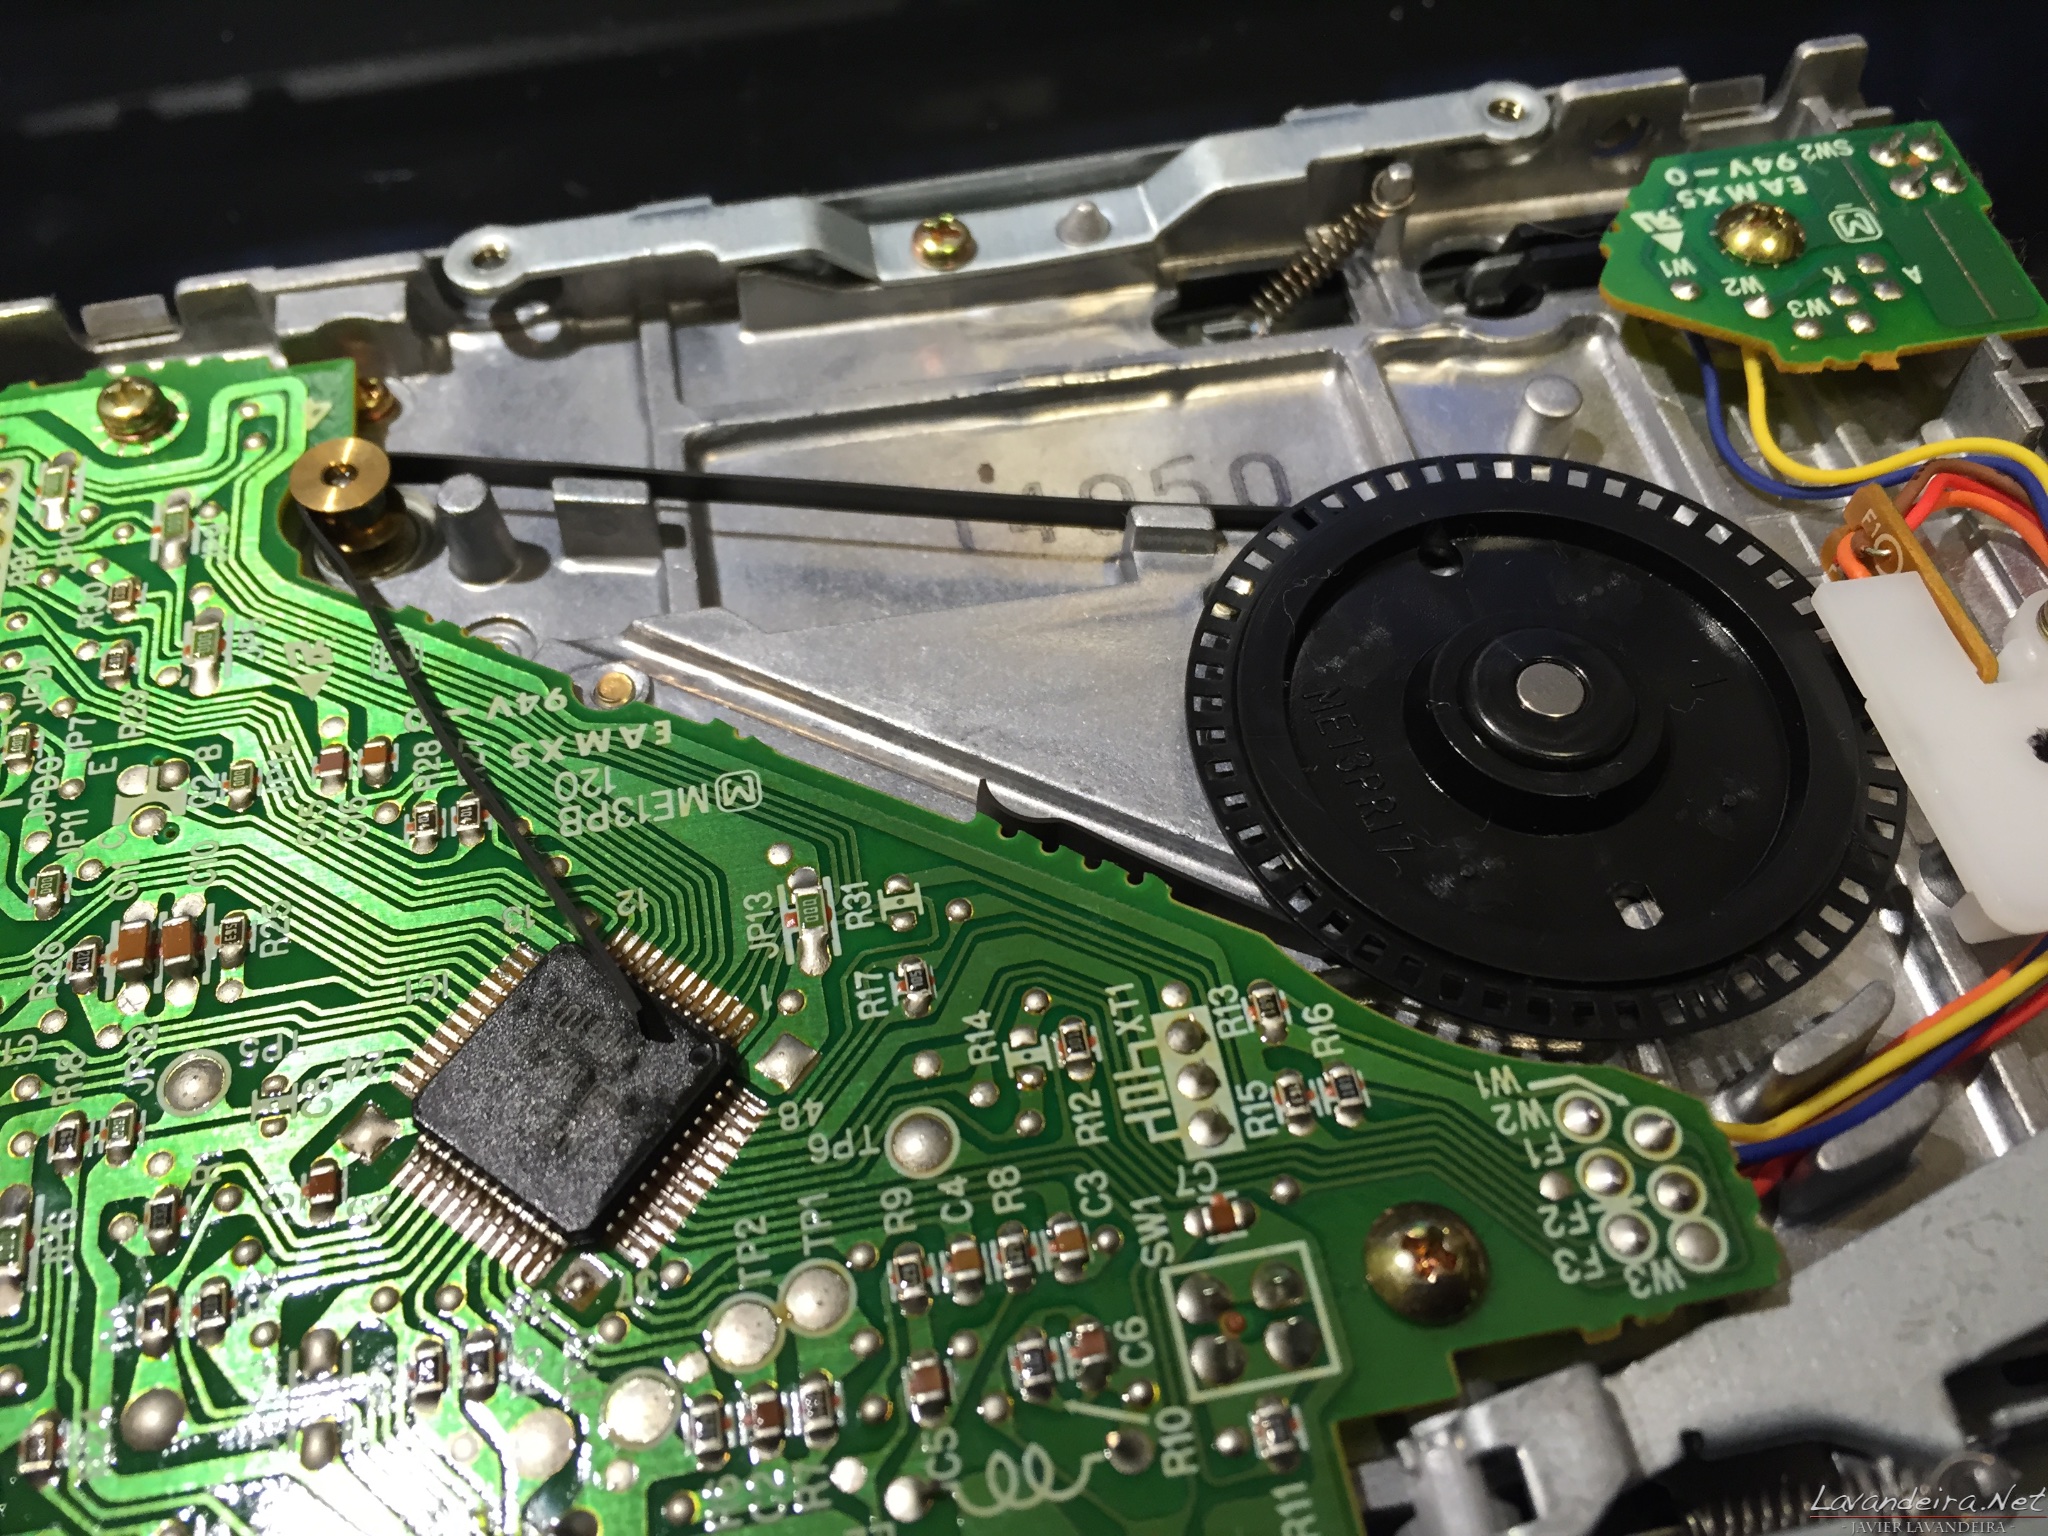
The rubber belt had melted and was stuck to the spindle. Click to enlarge.
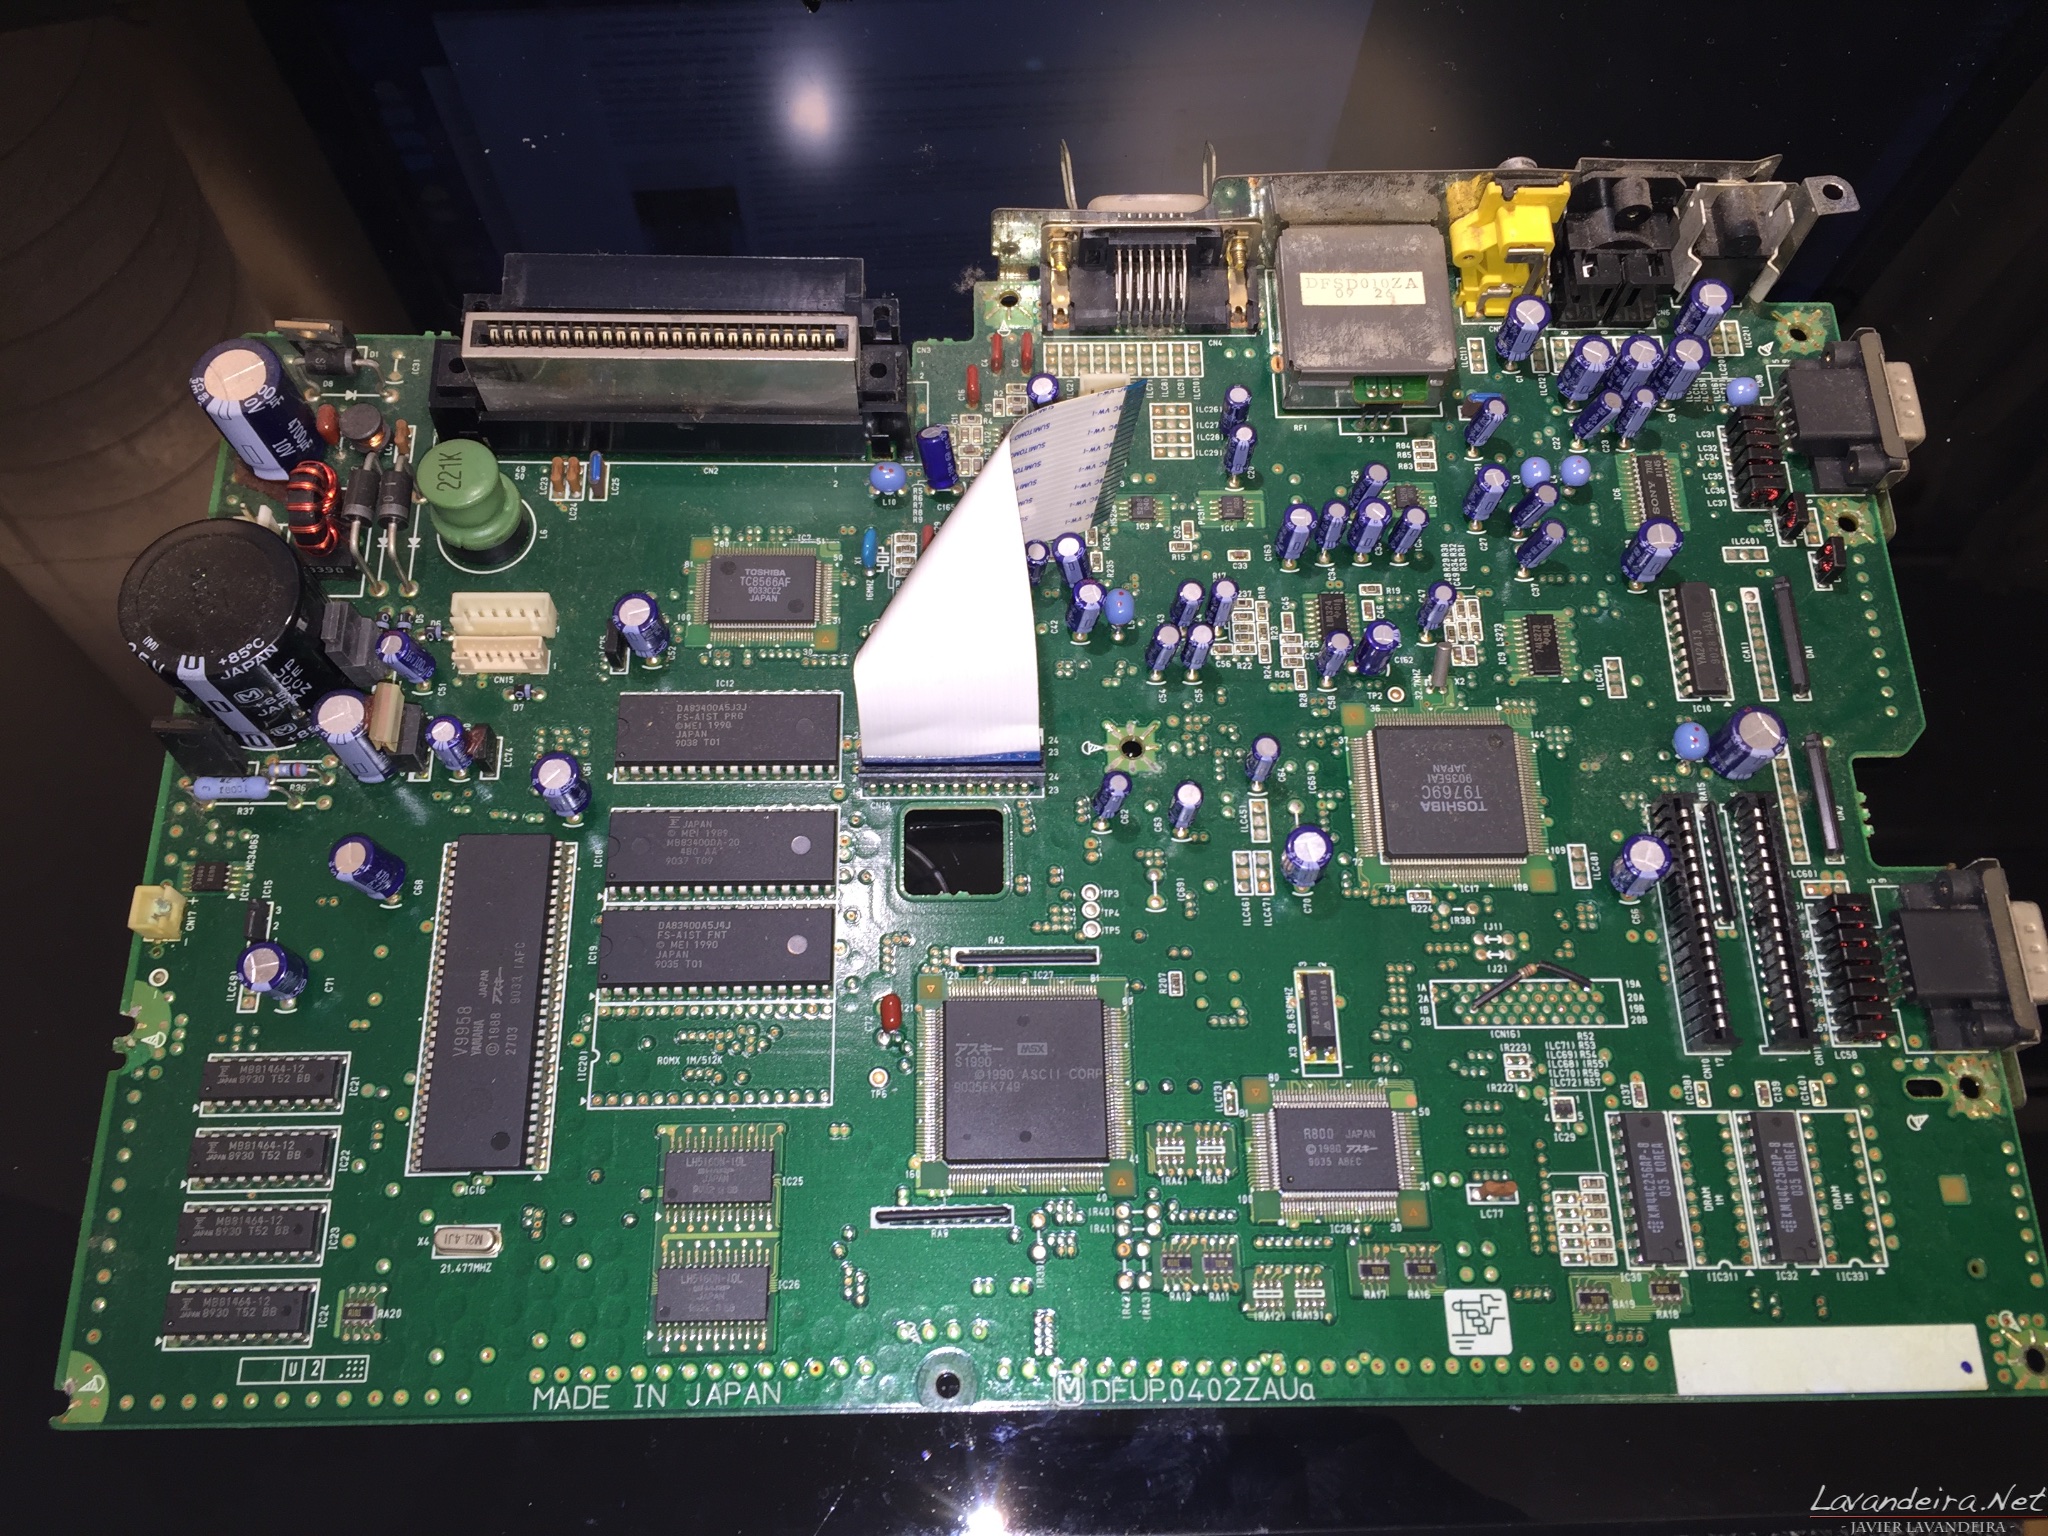
Logic board, almost undamaged. Only the battery connector (to the left) needs replacement. Click to enlarge.
First cleanup
The first thing I did was clean as much as I could with an air duster, both outside and inside the machine. This worked well for the electronic components and floppy drive, but didn’t do much with the case or the keyboard.
I removed the keyboard matrix leaving only the keys in their plastic frame, and soaked the whole thing for a couple hours in warm water with a little bit of bleach. This managed to remove all the dirt and also took away the smell, but didn’t do much about the yellowing:
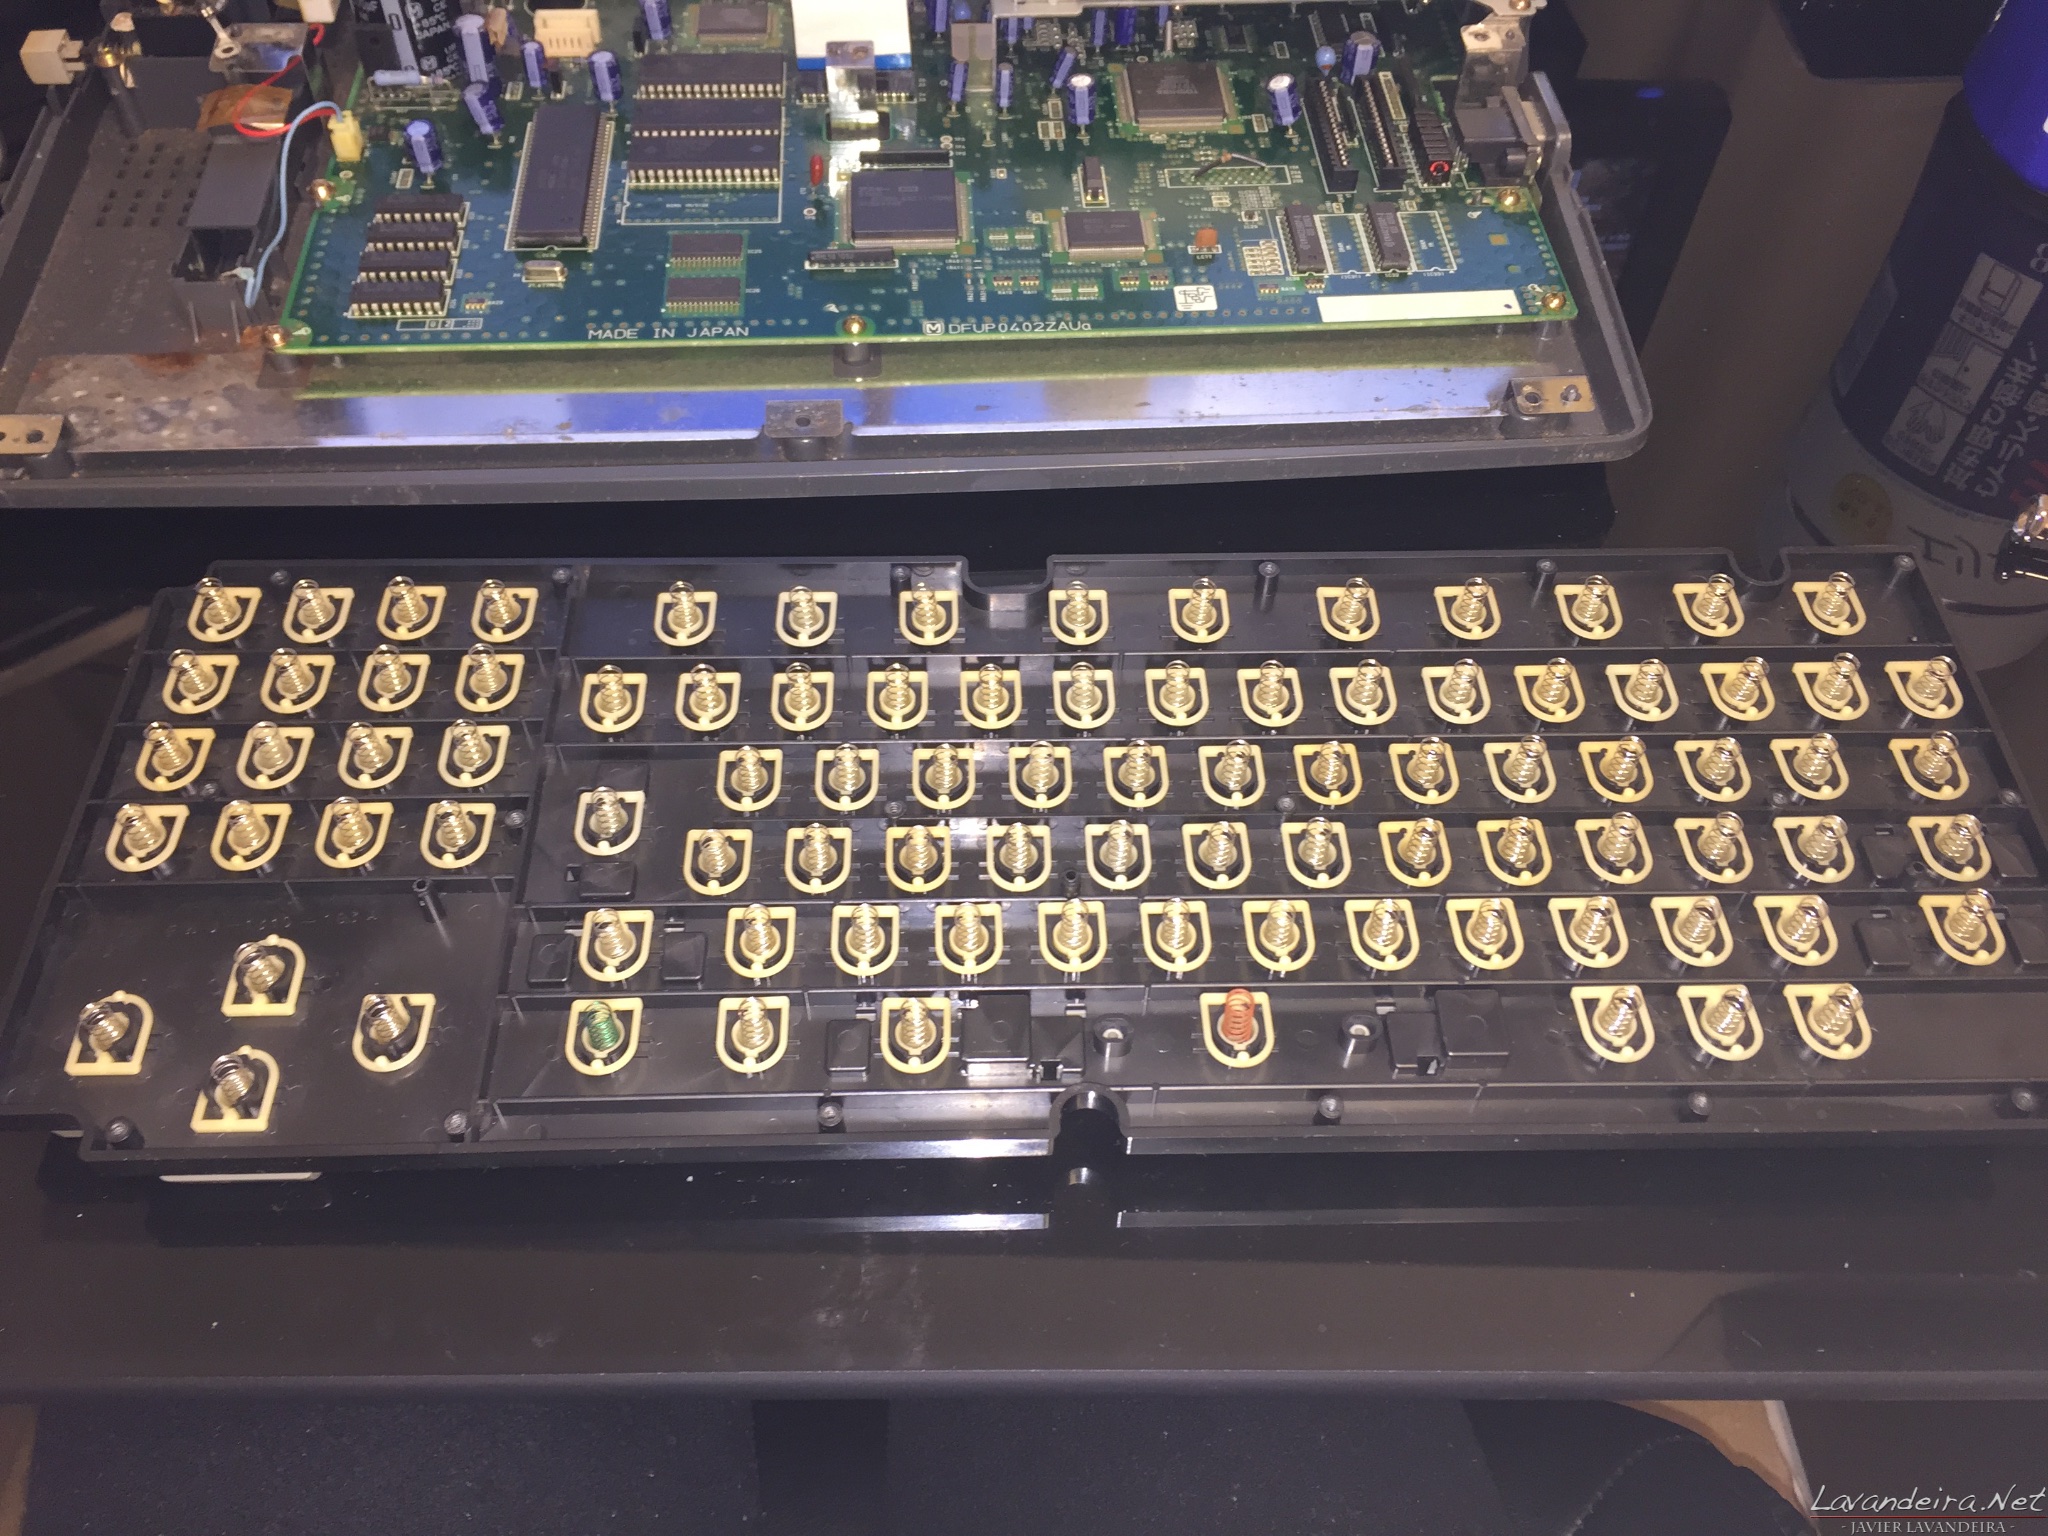
Springs under the keyboard matrix. Don’t lose any of them! Click to enlarge.
The FS-A1ST keyboard assembly after soaking in bleached water for a while. Click to enlarge.
Floppy disk drive
I went to the Panasonic customer support shop in Akihabara and ordered a bunch of replacement belts for the drive (part number DFWV75C0009). These were used by some Panasonic word processors and other devices with floppy drives, so they’re still in stock at the factory. The problem is that the support shop has a policy not to sell replacement parts that require disassembly of the device in order to discourage customers from doing their own repairs and getting electrocuted in the process.
Somehow I managed to convince the clerk to accept my order under my own responsibility. A few days later they phoned me saying that the parts had arrived and I went to pick them up.
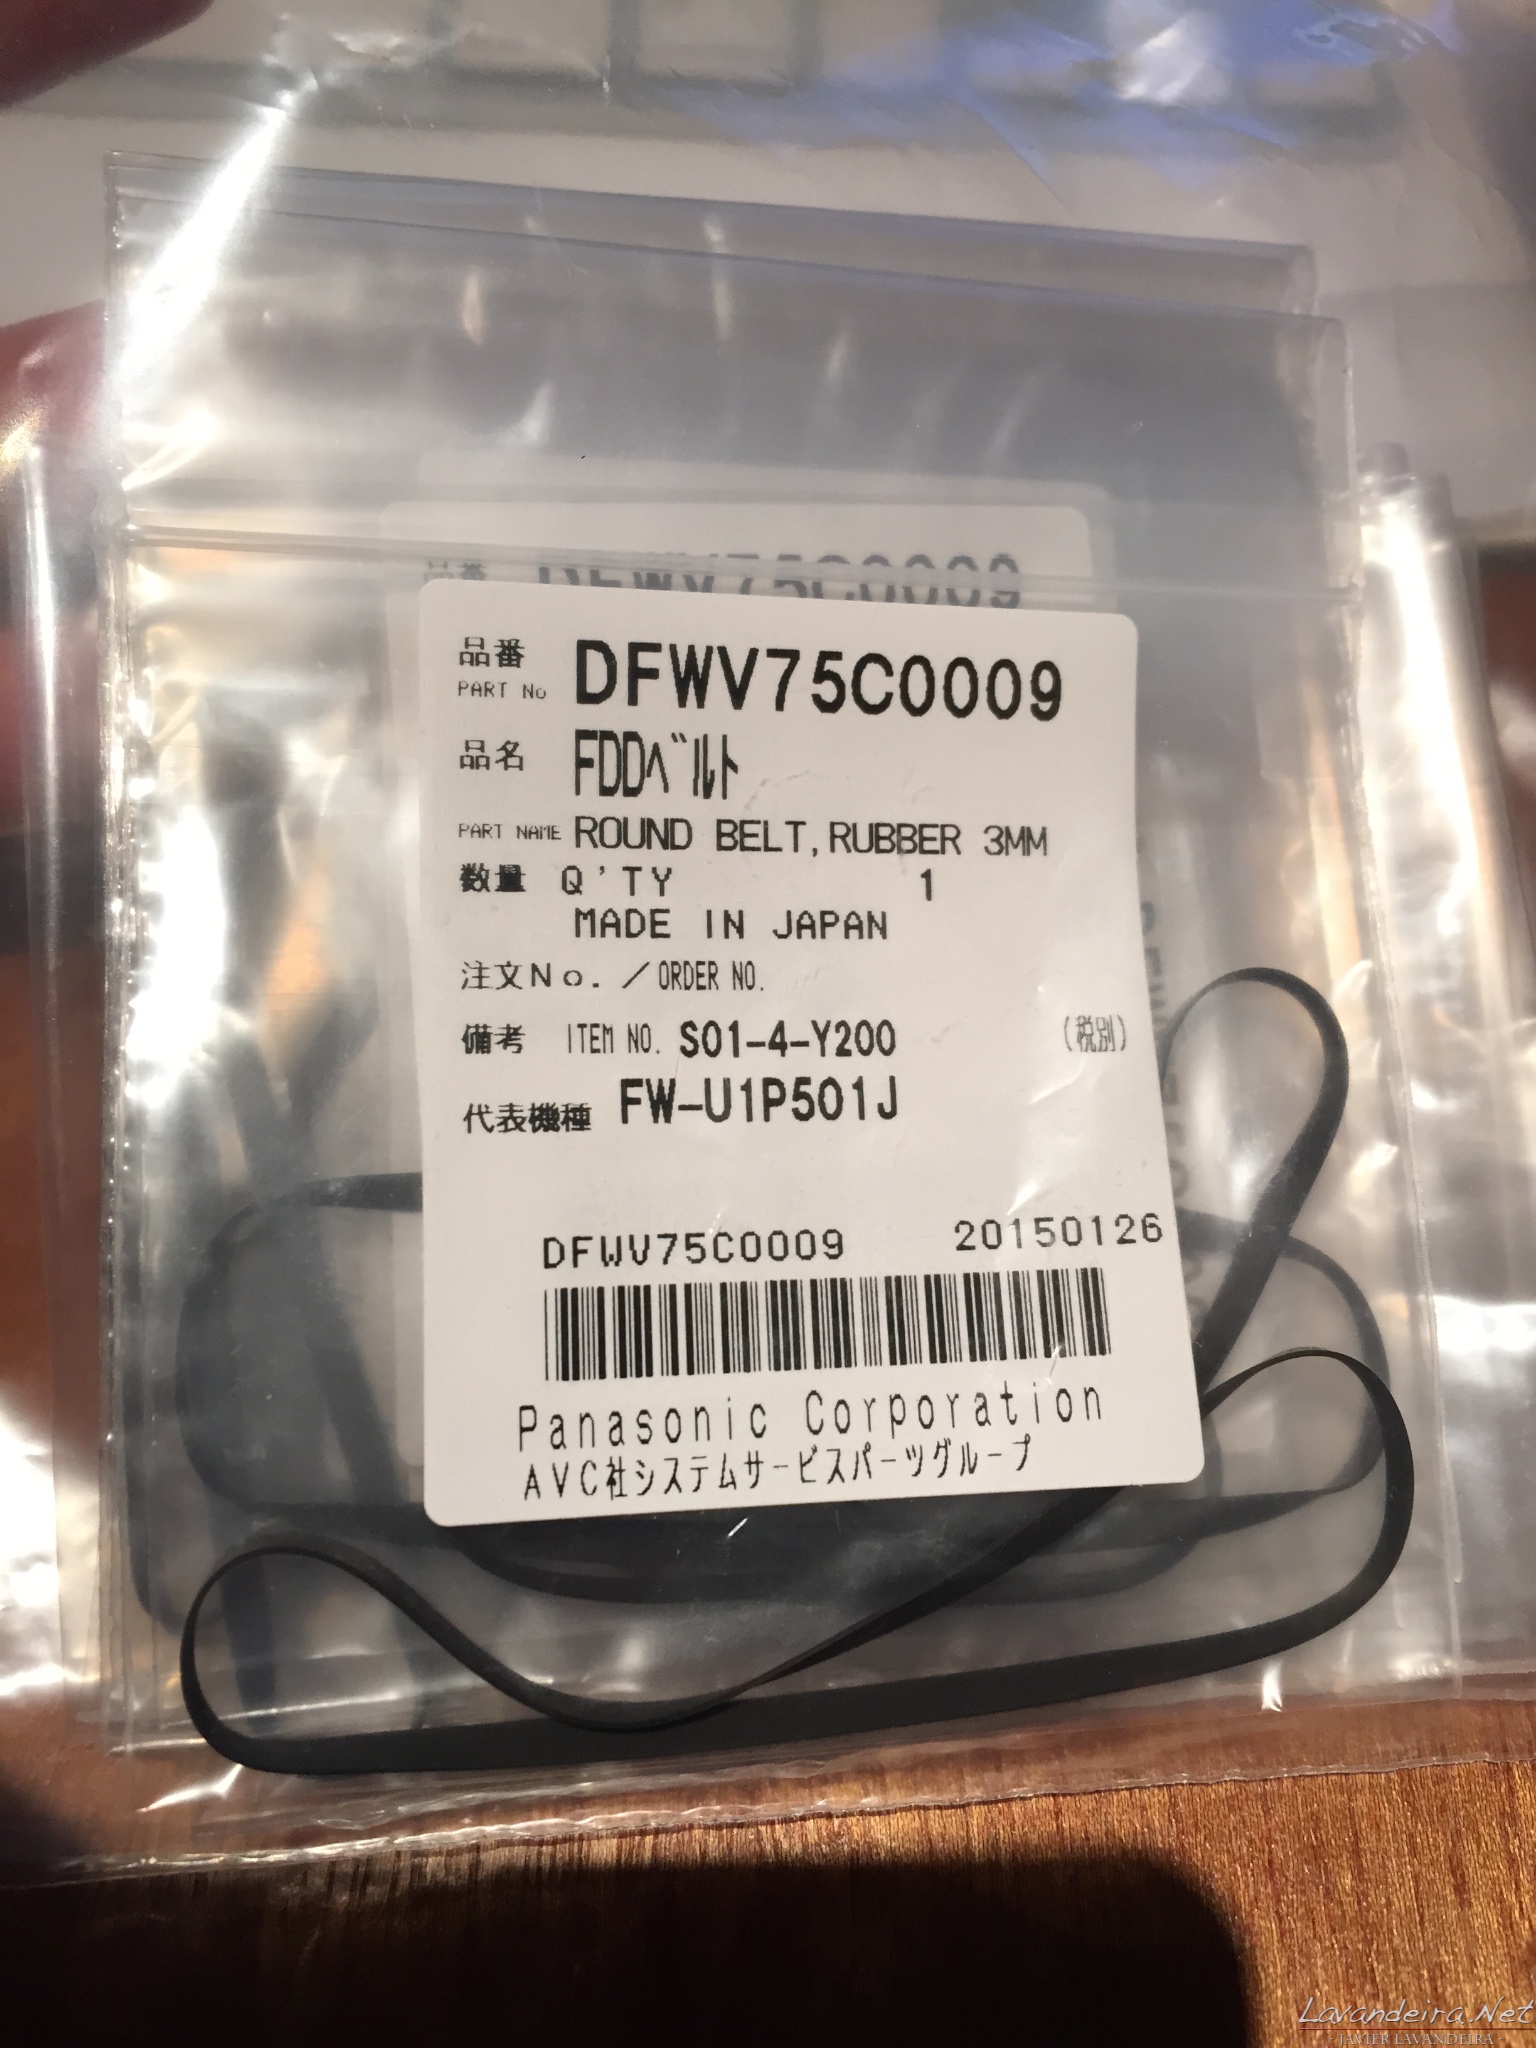
A bag full of floppy drive belts for Panasonic MSX 2+ and MSX turbo R computers. Click to enlarge.
Replacing the belt worked. The drive was alive again.
Whitening
I had heard about things like Retr0bright and using hydrogen peroxide to whiten yellowed plastic, but I didn’t want to risk it on the FS-A1ST. During a nomikai, @madscient (thanks!) told me that ワイドハイターEX (waido haita EX), a general purpose cleaning product sold in Japan, contains hydrogen peroxide and works well for restoring the original color in ABS plastic, so I decided to try it. It cost only about 200 yen for almost 500cc, so I bought 3 liters.
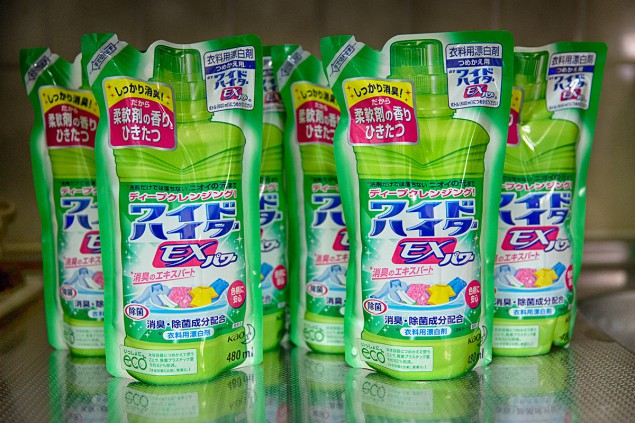
ワイドハイターEX. Not my photo. Source.
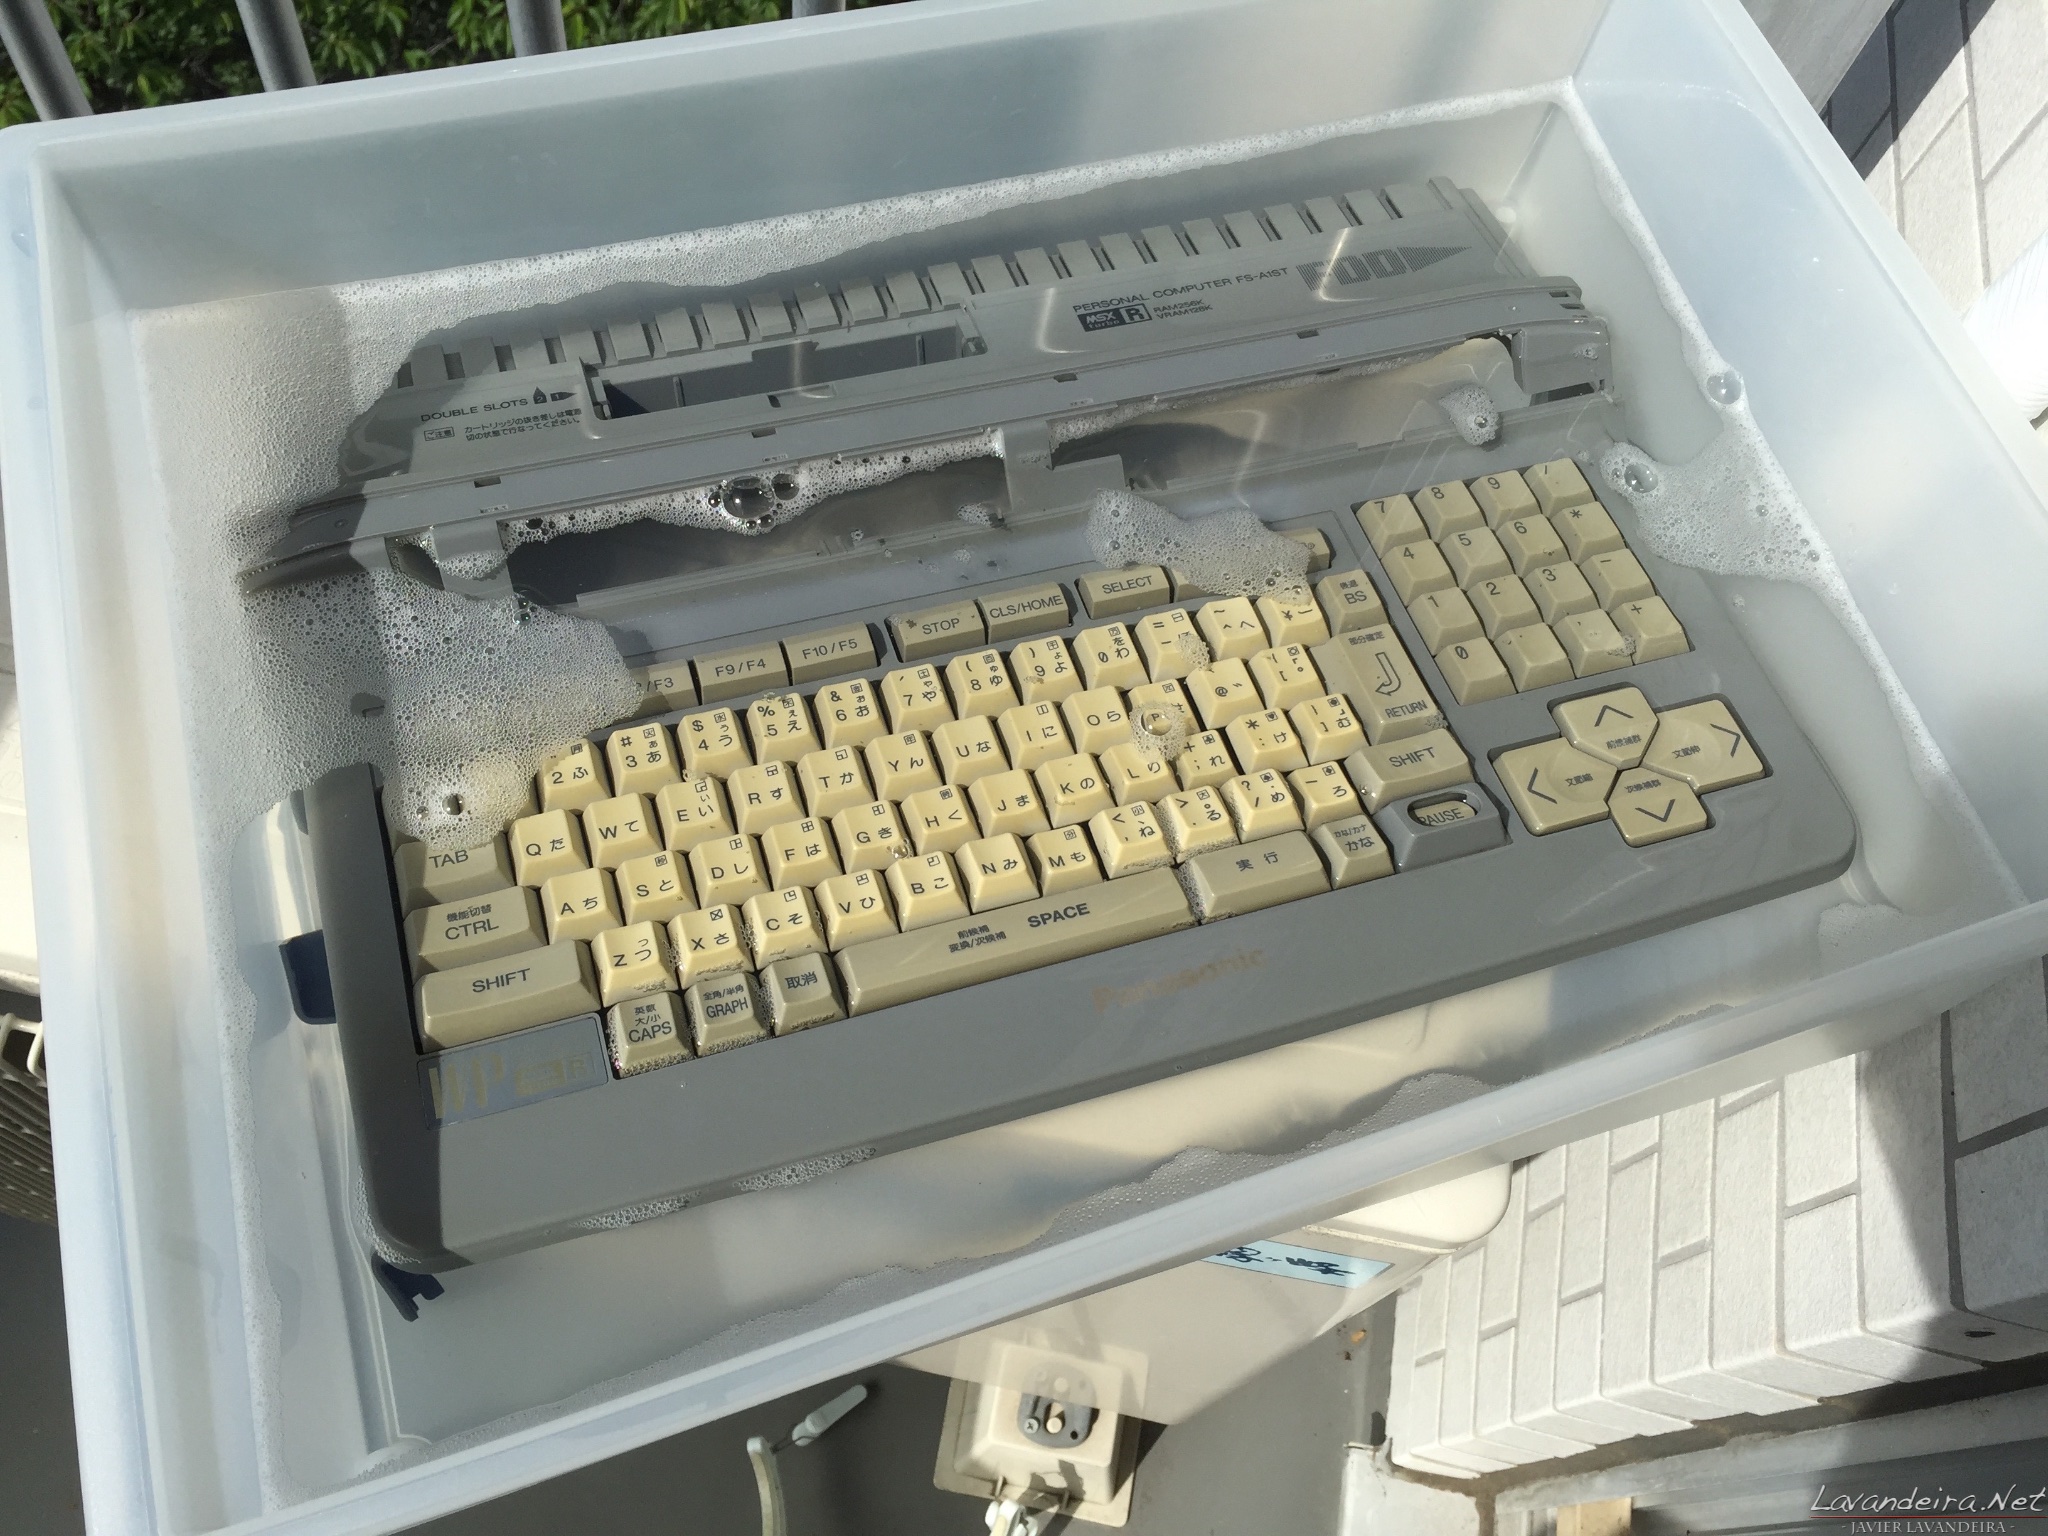
I didn’t want to risk damaging the plastic, so I diluted it (2 parts water, 1 part whitening agent) and filled a plastic storage box with it, then put all of the FS-A1ST’s plastic parts inside and lef the whole thing on the sun in the balcony. This is because hydrogen peroxide needs ultraviolet light to do its job, but I don’t have an UV lamp, so the Sun’s light would work just as well.
I spent a whole afternoon going to the balcony every few minutes to wet the top of the case, because it kept floating to the top and drying up.

Start of the whitening process. Click to enlarge.
After about two hours soaking in the sunlight. The keyboard looks slightly better, and the case is almost back to the original color. Click to enlarge.
After sunset I thought that the case was already more than good enough. It loooked even better than my FS-A1GT, which is in very good condition. The keyboard would need more time in the tank, but I didn’t want to leave it inside the solution when there was no UV light. I washed everything in the bathtub with soap in order to remove all traces of the cleaning agent and let it dry.

Drying up in the shower. Click to enlarge.
The next morning I continued whitening just the keyboard, floppy disk drive cover and power button. This time I kept it submerged using a few hashi. After a few more hours it looked much, much better.
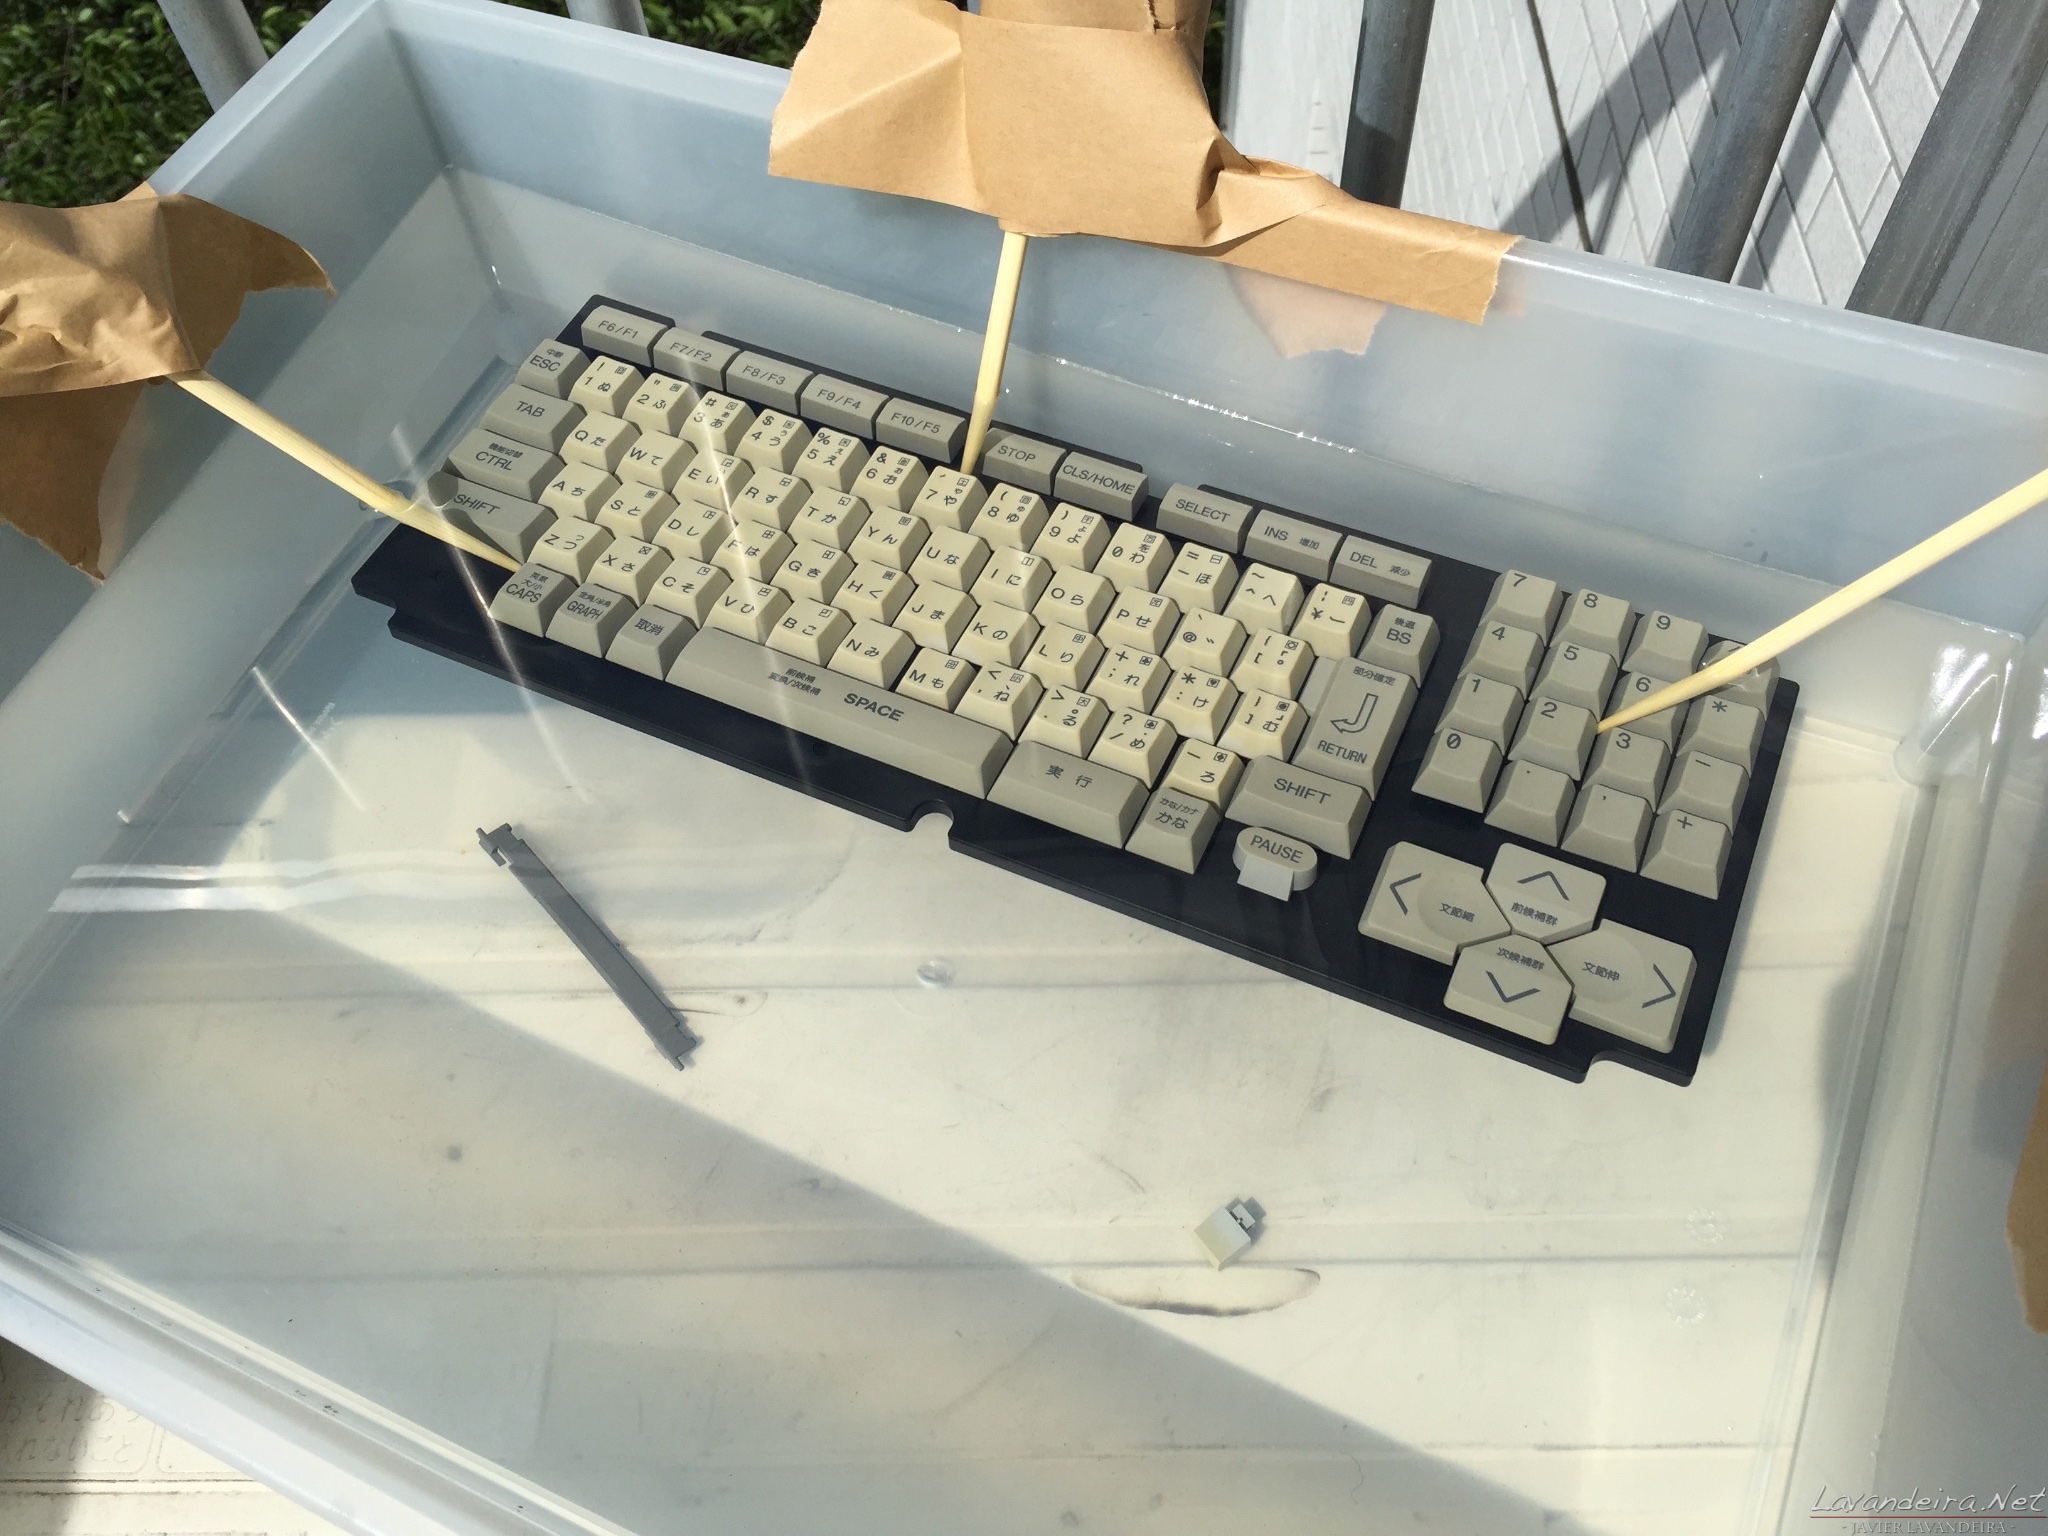
Whitening the keyboard. Click to enlarge.
Mid-afternoon I removed everything from the tank because it didn’t seem to be getting any whiter anymore. I don’t know whether this is as much as can be done, or the whitening solution had lost strength after a day out.
In any case I was very happy with the result.
Putting it back
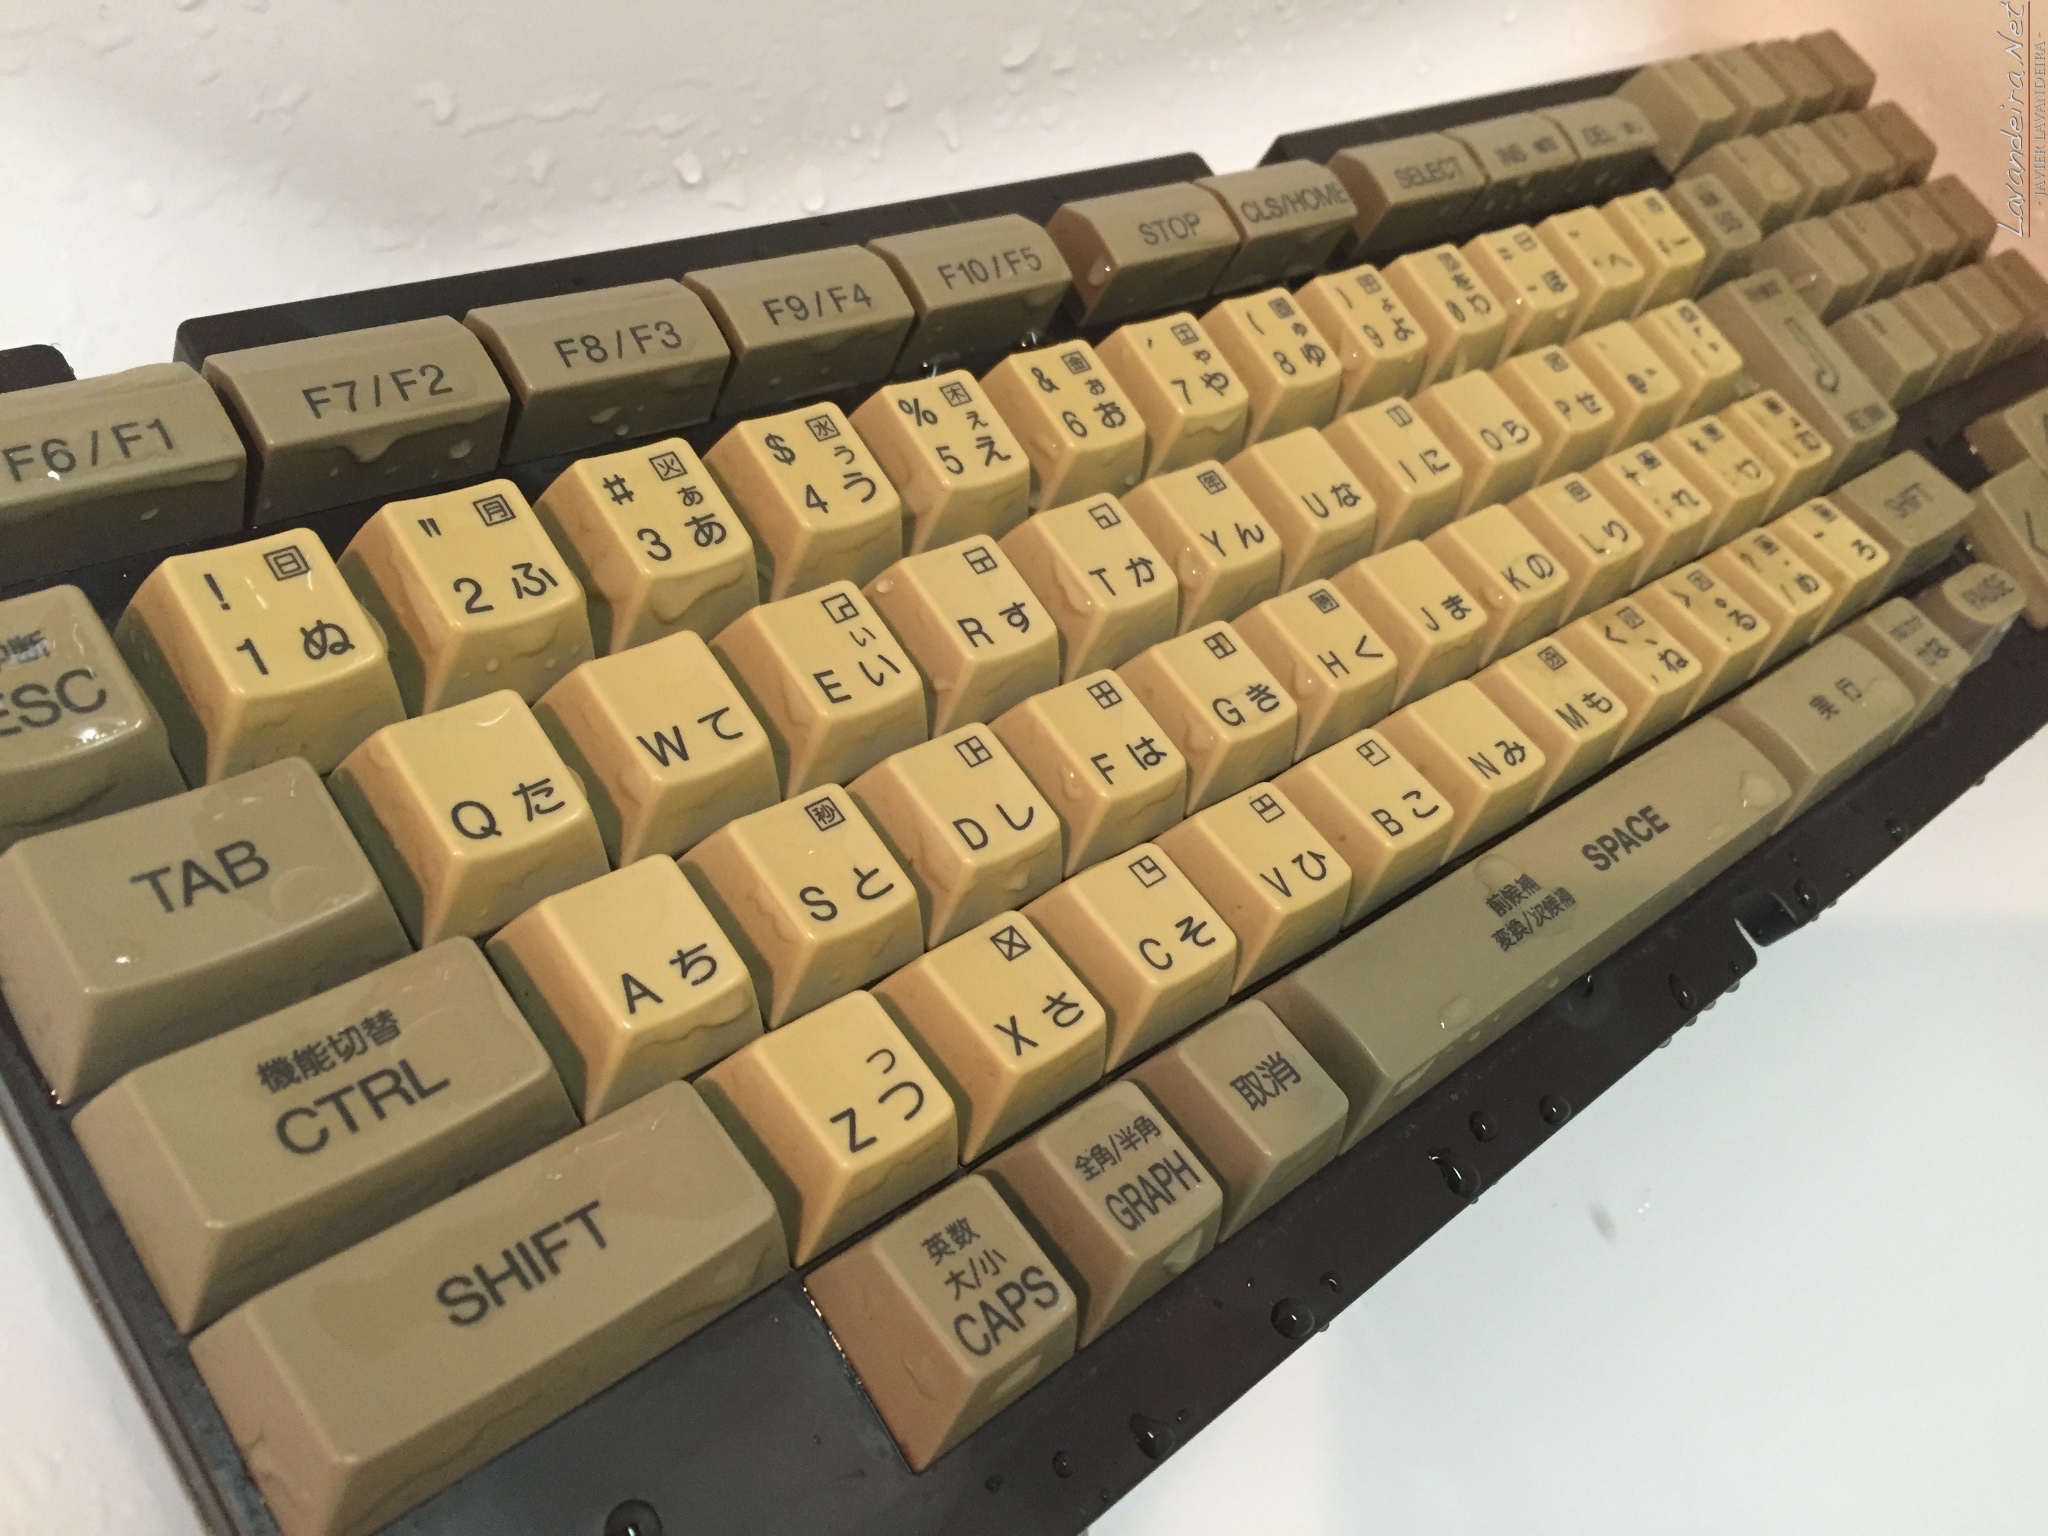
I let the plastic parts dry for a few days (just in case) and I reassembled it tonight. Everything works perfectly, and it looks clean! The case looks as good as my FS-A1GT’s, which is almost perfect. The FS-A1GT’s keyboard is whiter, but not by much. The FS-A1ST is now in a much better condition than many other machines I’ve seen.
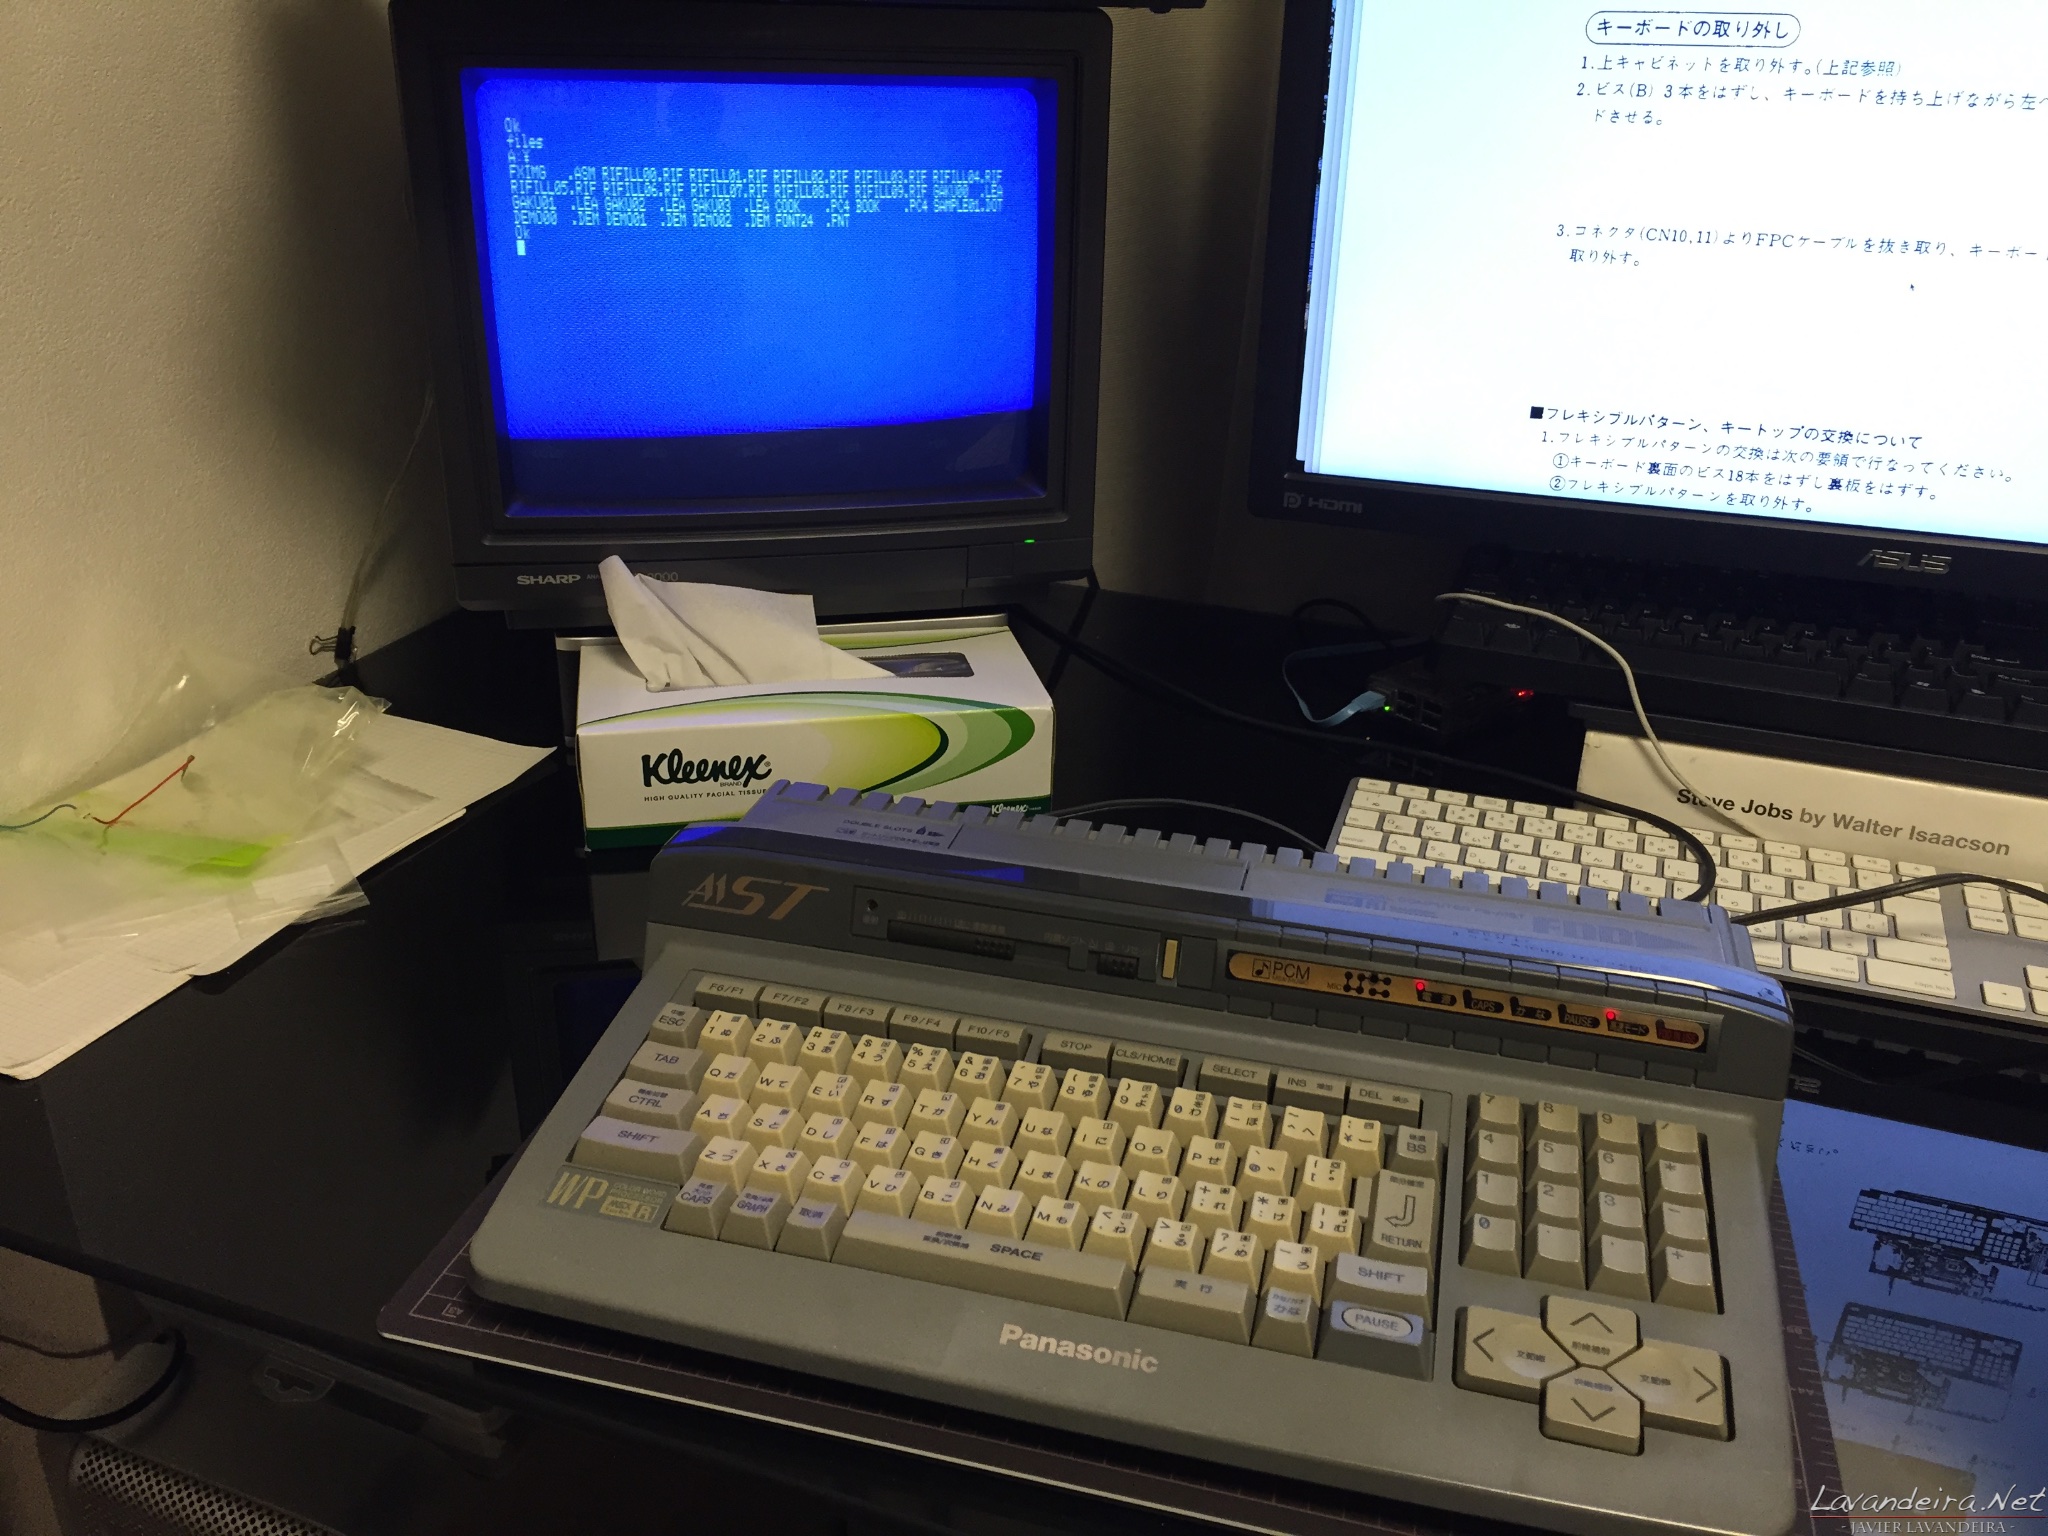
Checking that everything works properly. Click to enlarge.
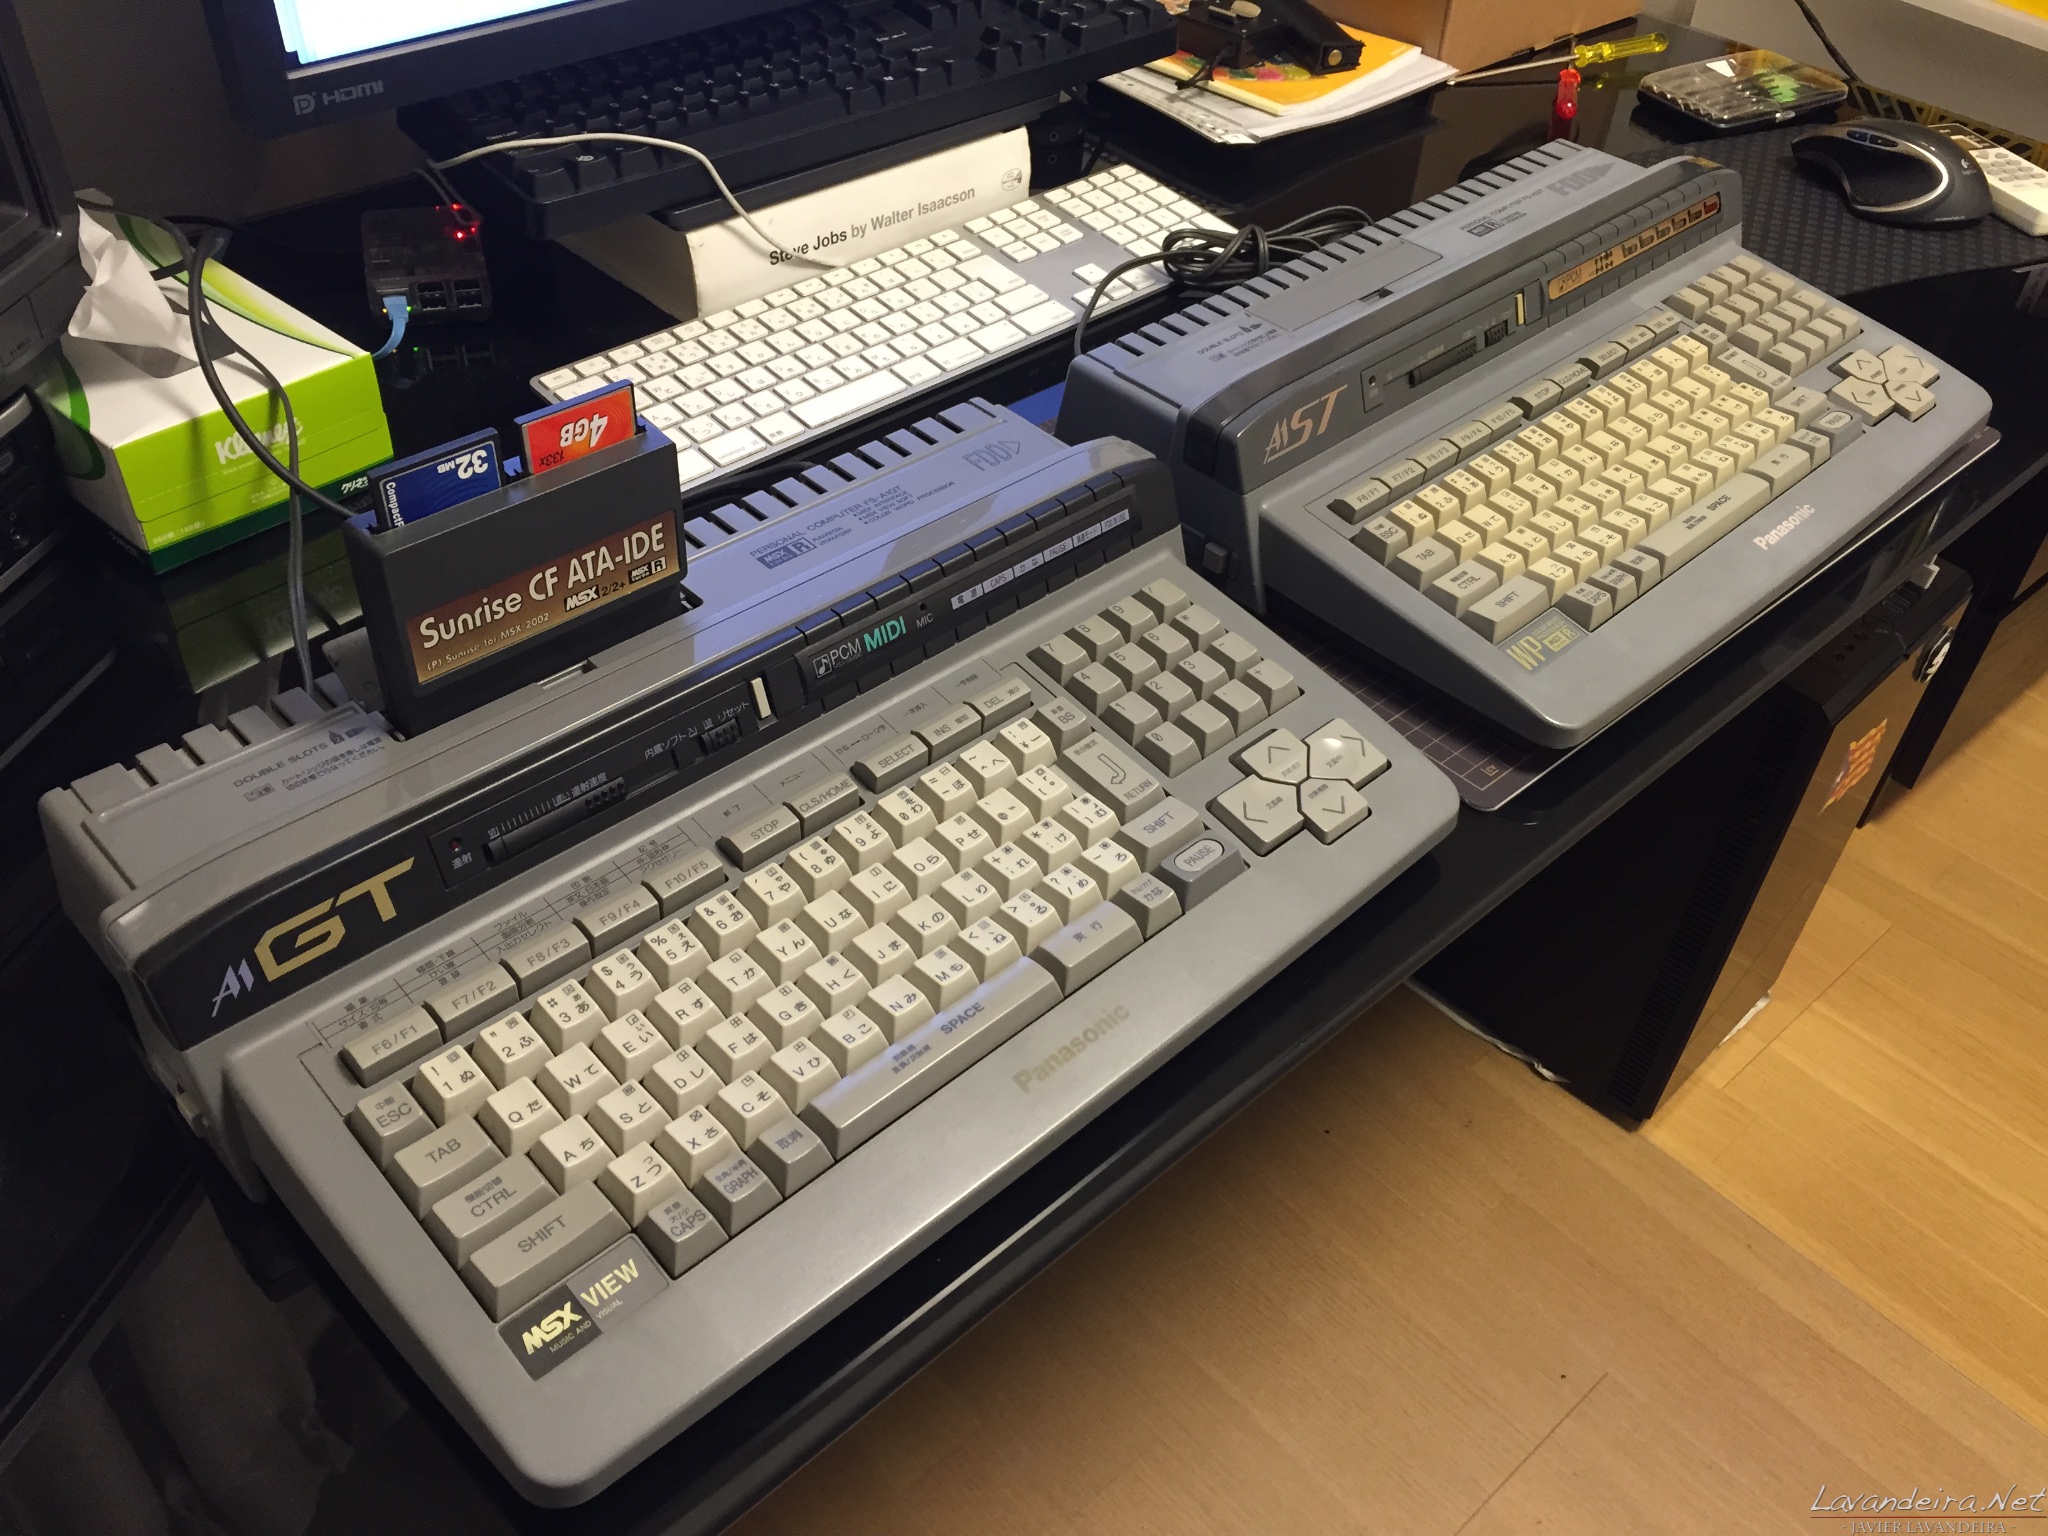
My Panasonic FS-A1GT and FS-A1ST side by side. Notice the slight color difference in the keys. Click to enlarge.
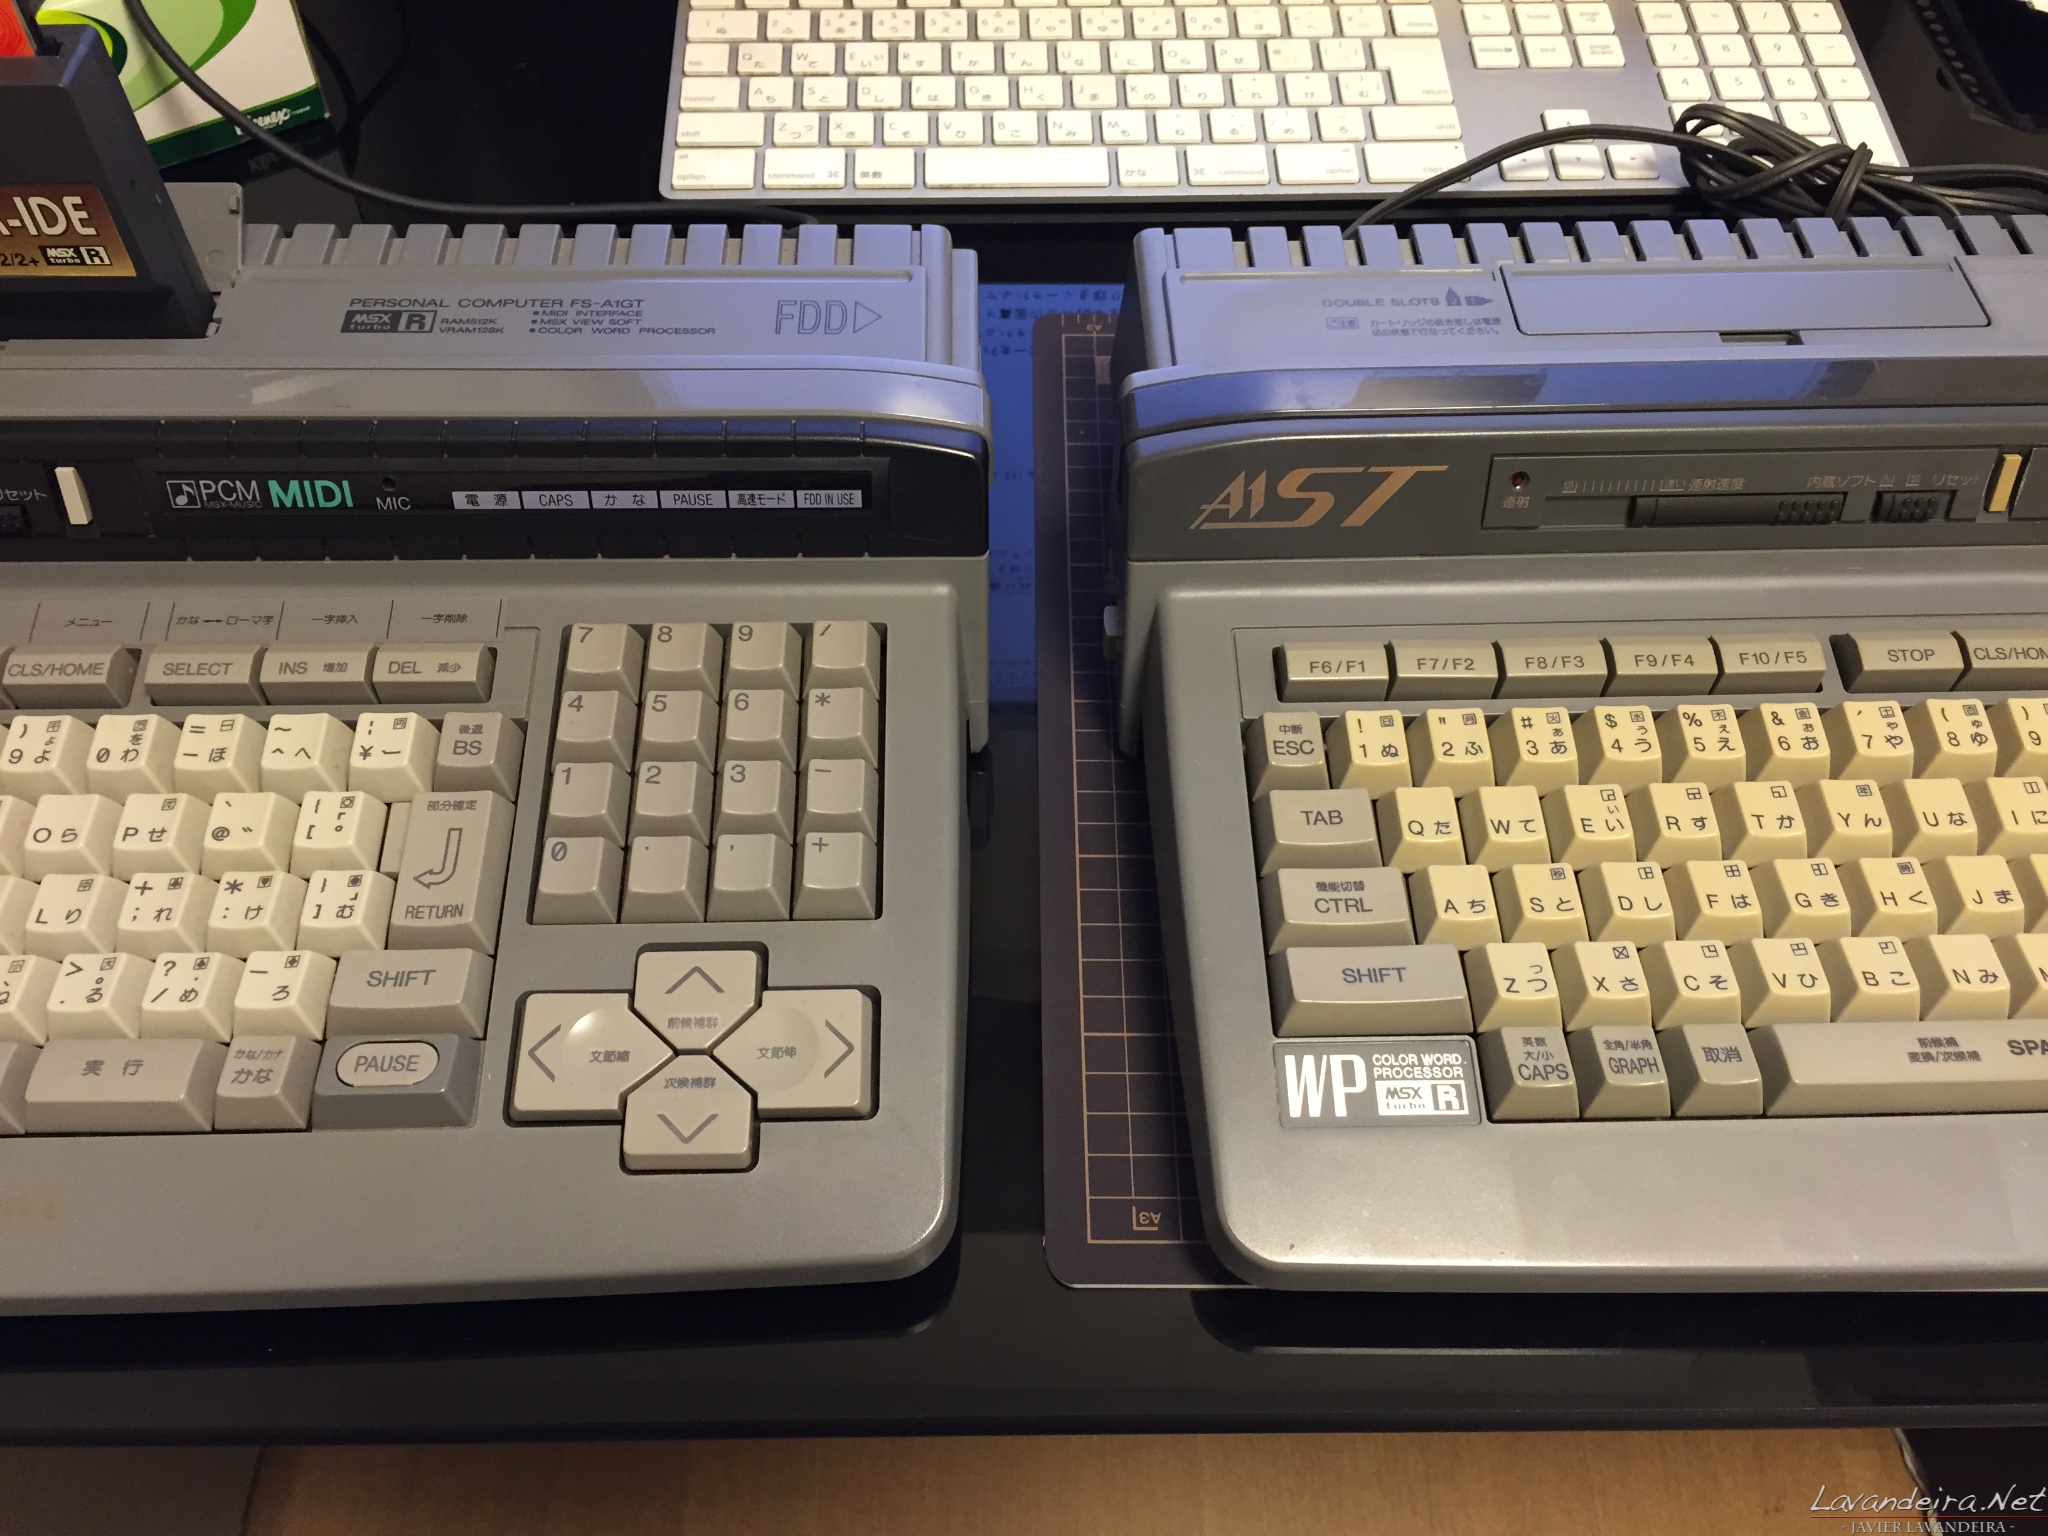
A better closeup. Click to enlarge.
Last pending thing
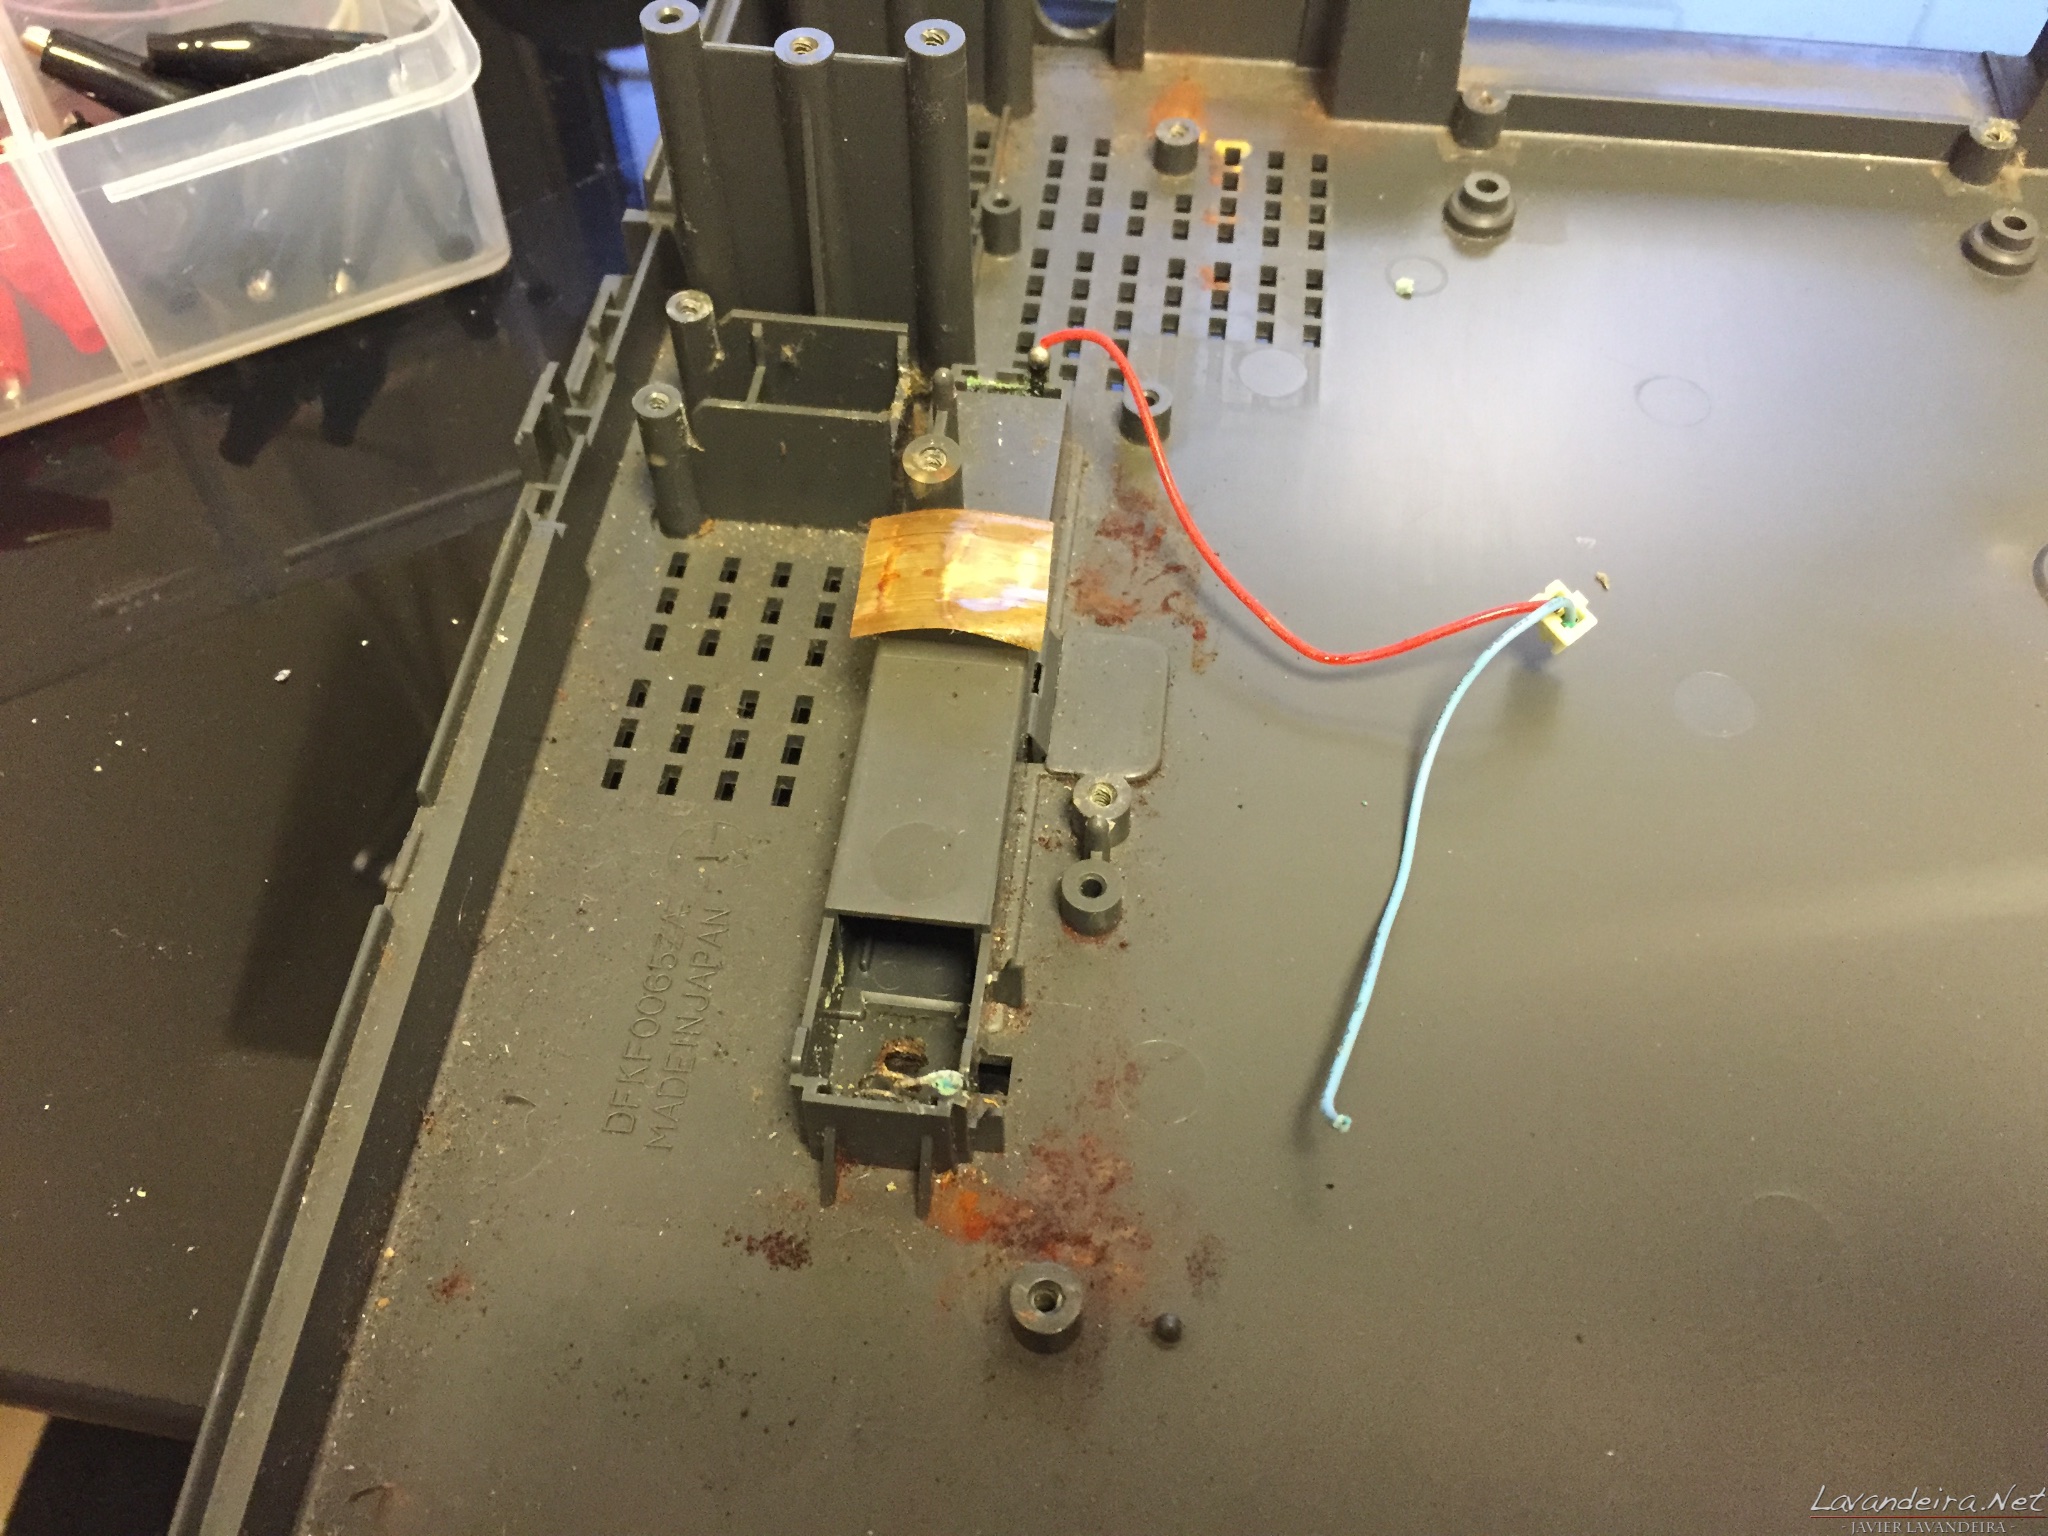
You may remember that the battery cable and connector were in very bad shape and need to be replaced. This is trivial. I’ve already ordered the parts. I’ll replace these contacts and connectors this weekend, then this machine will be like new!
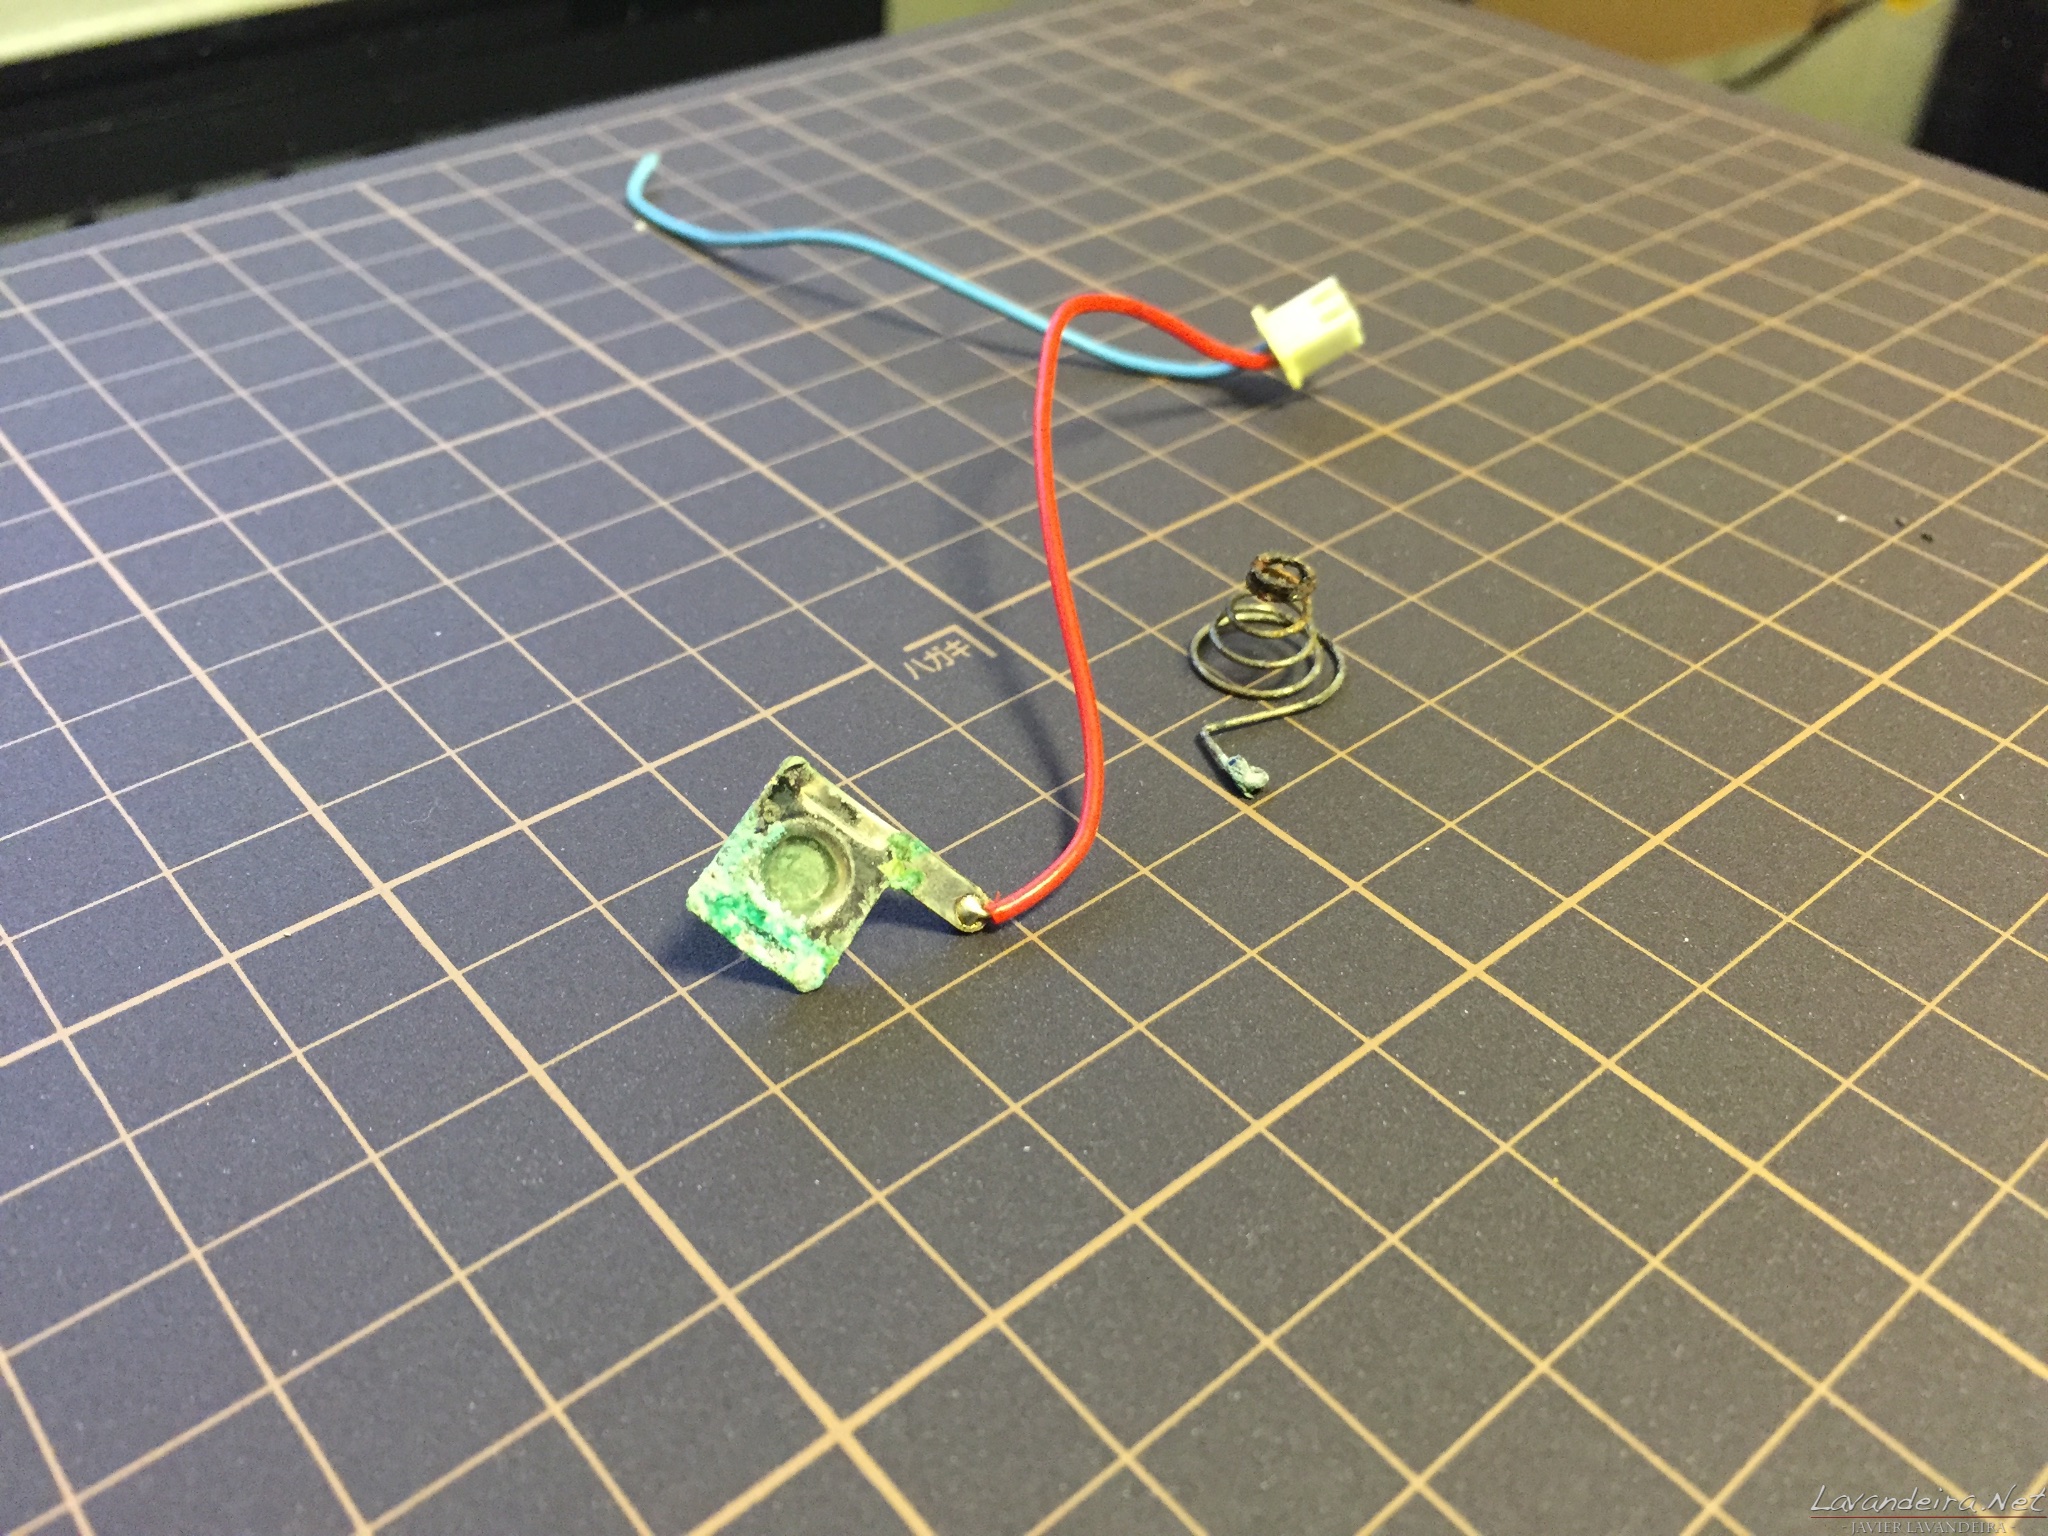
These parts are in an awful condition and need to be replaced. Click to enlarge.
Thanks
Very special thanks to @kadenken and @madscient for their advice!
Lovely!
I love seeing vintage hardware being restored like this!
Very nice. I stumbled upon this, after having bought a FS-A1ST myself this week. My guess is, that I’ll have to go through a similar exercise. So this is very useful for me! Thanks for the story and the pictures.