
Relearning MSX #20: Assembly language overview
Posted by Javi Lavandeira in How-to, MSX, Retro, Technology | August 25, 2015In the previous post we learnt what an assembler does and also the differences between assembly language and two high-level programming languages: BASIC and C.
This time we’ll see an actual assembly language program and compare it with a BASIC program that does the same function. We’ll learn about pseudoinstructions and labels, and we’ll see an example of an assemble list for our first assembly language program.
Note: so far I’ve been using the terms assembly language and assembler, the first one when talking about the programming language we use to write programs, and the second one to refer to the program that handles the task of converting the source code into a file we can run. However, many people often use the term assembler to refer to the assembly language as well. I’m one of these people. Because of this, keep the following in mind:
- Assembly language (or just assembly) always refers to the programming language
- Assembler may refer to either the programming language, or to the program used to assemble the source code
The context in the sentence should always make it clear to see which one we’re talking about.
Let’s start:
Assembly language overview
We’re going to start with a very simple program. This program will ask us to enter a character on the keyboard, and then it will print the ASCII code for that character in hexadecimal.
In BASIC, this program would be like this:
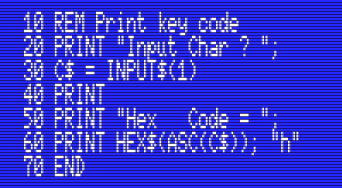
BASIC program that takes a key and prints its ASCII code.
You can follow this program easily:
- Line 10 is a comment. It doesn’t do anything.
- Line 20 prints a message on the screen asking for a character.
- Line 30 waits until the user enters a character on the keyboard
- Line 40 moves to the next line in the screen
- Line 50 prints some text in the screen
- Line 60 prints the actual ASCII code for the character enter in line 30, in hexadecimal
- Line 70 ends the program
Running this program results in this:
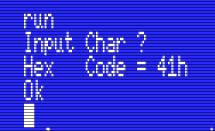
- The program prints a message and waits for us to press a key
- The program prints a second message, followed by the key’s ASCII code
- The program ends
Now we’re going to see this same program, but written in assembler. What follows now is an actual assemble list. It includes the original program, as well as the result of assembling the program. Don’t worry if you don’t understand it yet, I’ll explain what everything is. Here it comes:
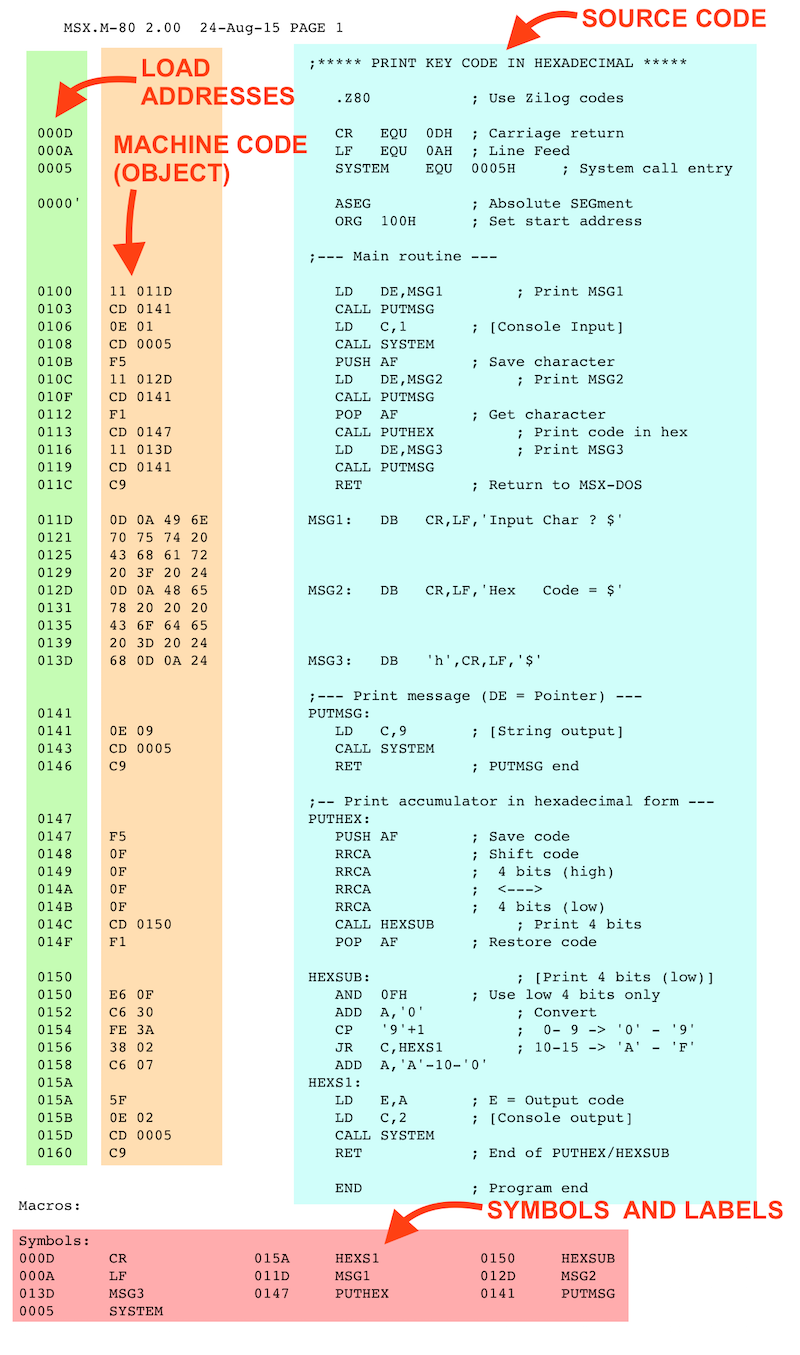
Assemble list. Click to enlarge
That’s a big image. You may need to keep the listing open in a separate window while reading this. If you prefer to look at the original, uncolored text version, click here.
Let’s start describing it from the right:
- The light blue area is the source code (in assembler) of our program. This is the part that we actually type in a text editor. Here‘s the original source file, if you want to take a look.
- The orange column is the object code. These are the actual bytes that compose the program after the assembling. This is machine code.
- The green column are the load addresses and the values for symbols and labels. More on this later.
- Finally, the red area at the end contains a summary of all the symbols and labels found in the program.
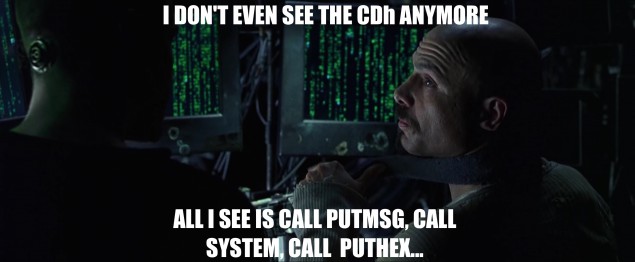
Yes, Cypher, but using assembler is less painful than using machine code
Mnemonics and pseudoinstructions
The assembler program is composed by lines of code (blue area in the image). Some lines have a semicolon ( ; ) with some text following it. The semicolon and everything to its right are comments (exactly the same thing as REM in BASIC programs), and have no impact in the resulting program.
The lines that contain Z80 instructions (mnenonics) have one to three bytes of machine code in the orange area to the left, and the leftmost column (green area) indicates the address in the computer’s memory that will contain the machine code bytes.
For example:
The mnemonic “LD C,1” translates to bytes 0Eh, 01h in machine code, and these will be loaded in memory addresses 0106h and 0107h
The line ‘CALL SYSTEM’ translates to bytes CDh, 05h and 00h in machine code, and these will be loaded in addresses 0108h, 0109h and 010Ah
‘PUSH AF’ translates to byte F5h in machine code, and that byte will be in memory addres 010Bh in the resulting program
We’ll see in a moment why CALL SYSTEM translates to CDh, 05h and 00h, and in a later post we’ll see why in this order (instead of CDh, 00h and 05h).
The source code also contain several pseudoinstructions. These do not correspond to any CPU instruction. They’re intended to affect the way the assembler will assemble the program. We’ll see them in more detail later, but here’s a quick explanation of what these are and what they do:
- ORG: Defines the memory address where the assembler will put the assembled code.
- ASEG: Sets the location counter to an absolute segment of memory. We’ll see what this means later.
- .Z80: Tells the assembler that we will be using Z80 mnemonics. This is because the assembler we’ll be using (Microsoft’s Macro-80) also supports 8080 mnemonics.
- EQU: Defines a value for a symbol
- DB: Stores bytes of data in the object code
- END: Tells the assembler to stop assembling when it reaches this point
One thing that’s very important to remember is that these pseudoinstructions aren’t part of the Z80 instruction set nor the assembly language. These are just commands that tell the assembler program what to do (“put this code in this memory address”, “put this the bytes of this text string in memory”, etc), and they vary from assembler to assembler.
The assembler we’ll be using is Microsoft’s MSX-M80 V2.0. This is the assembler included in ASCII’s MSX-DOS2 TOOLS package. Unlike the older CP/M versions of M80, it has full MSX-DOS2 support.
Symbols and labels
Another very important component of assembly language are the symbols. The sample program we saw earlier has several:
CR, LF, SYSTEM, PUTMSG, PUTHEX, HEXSUB, HEXS1, MSG1, MSG2, MSG3
Symbols are just a way to give a name to a numeric value. For example, near the beginning of the example program there is this line:
SYSTEM EQU 00005H
This tells the assembler that every time it sees the symbol “SYSTEM” it should replace it with the value 0005H (5 in hexadecimal.) Therefore, when the following code appears in the program…
CALL SYSTEM
…the assembler will see it as:
CALL 0005H
Symbols are a benefit for the programmer because they make the program easier to understand and to maintain. For example, if for any reason we had to change the value of SYSTEM then we just need to change the EQU line at the beginning of the program, instead of searching every CALL instruction and changing the value next to it.
Besides EQU, we can also use a colon ( : ) to define the value of a symbol. We did exactly this in the example program with these symbols:
PUTMSG, PUTHEX, HEXSUB, HEXS1, MSG1, MSG2, MSG3
This type of symbols are called labels. If you look at the code you’ll easily understand why: instead of explicitly defining a value like we did with EQU, the value takes the value of the memory address where it appears. For example, let’s take a look at the PUTMSG routine:

The PUTMSG label takes the value 0141H
In this code we see that the PUTMSG label takes the value 0141H, which is just the memory address where it appears. If the main routine had been longer or shorter then PUTMSG would be located in a different address, and its value would change accordingly. Using this label means that we don’t have to worry about manually entering the subroutine’s address manually every time we want to CALL it. The assembler keeps track of the label values.
Summary
We’ve seen an example assembly language program. We’ve learnt about mnemonics and pseudoinstructions for the assembler. We’ve learnt about symbols and labels. We’ve also seen how the assembler translates mnemonics into machine code bytes.
And by the way, we haven’t seen how to generate runnable programs from assembler code yet, but here’s the binary resulting from assembling the example program. It runs under MSX-DOS and MSX-DOS2:
- KEYCODE.COM (97 bytes)
In the next chapter…
Before we start writing more programs we’ll see how the operating system (MSX-DOS) can make things easier for us with its input/output and file management functions.
This series of articles is supported by your donations. If you’re willing and able to donate, please visit the link below to register a small pledge. Every little amount helps.
Javi Lavandeira’s Patreon page
Mh… just discovered the “dump” command! I suggest you try it with keycode.com and try to identify the object code :)
F:>dump keycode.com
F:KEYCODE.COM:
0000: 11 1D 01 CD 41 01 0E 01 CD 05 00 F5 11 2D 01 CD …�A…�..�.-.
0010: 41 01 F1 CD 47 01 11 3D 01 CD 41 01 C9 0D 0A 49 A.��G..=.�A.�..I
0020: 6E 70 75 74 20 43 68 61 72 20 3F 20 24 0D 0A 48 nput Char ? $..H
0030: 65 78 20 20 20 43 6F 64 65 20 3D 20 24 68 0D 0A ex Code = $h..
0040: 24 0E 09 CD 05 00 C9 F5 0F 0F 0F 0F CD 50 01 F1 $..�..��….�P.�
0050: E6 0F C6 30 FE 3A 38 02 C6 07 5F 0E 02 CD 05 00 .�0�:8.�._..�..
0060: C9
Interesting to notice addresses start at 0000h and not at 00100h.
Exactly! The whole contents of the file are nothing more than the object code.
The output from the dump command starts at 0000h because those aren’t addresses, but the offset from the beginning of the file. When MSX-DOS(2) loads the program it loads it from 0100h and then transfers control to that address.
This is explained in post #22 (to be published next week).