Relearning MSX #10: The KID (AKID) text editor (part 1)
Posted by Javi Lavandeira in MSX, Retro, Technology | January 11, 2015In the last few posts we saw how to install MSX-DOS2, MSX-DOS2 TOOLS and MSX-C v1.2. This is what we’ve done so far:
- Setting up the MSX-C environment, part 1: Emulator setup (openMSX)
- Setting up the MSX-C environment, part 2: Hard disk partitions and MSX-DOS2 install
- Setting up the MSX-C environment, part 3: Install MSX-DOS2 TOOLS
- Setting up the MSX-C environment, part 4: Install MSX-C v1.2
- Setting up the MSX-C environment, part 5: Install MSX-C Library
At this point we can already compile C programs, but the process is annoying and involves lots of typing. The next obvious step is prepare a script to do the work for us, and will require using a text editor. Since I’m assuming no previous experience, I’m going to explain the text editor included in MSX-DOS2 TOOLS, AKID (and its sibling KID) before we prepare our compile scripts.
You can skip this post if you’re already familiar with KID/AKID, or if you prefer to use a different text editor that you’re already familiar with.
What’s exactly a text editor?
Simply put, a text editor is a program to enter plain text in a computer and save it into a text file. Plain text consists just of normal characters: letters, numbers, punctuation marks, newlines, etc.
Do not confuse a text editor with a word processor. A word processor includes extra information in the files it generates. This information may be font names, colors, styles, file version numbers, maybe charts and images, etc.
Generally speaking, nowadays we use text editors to create files that will be used by a computer (computer programs, configuration files, etc), and word processors to create documents intented for people (reports, documentation, etc). Because of this, though the files created by both may look similar on the screen, the contents written to the files on your computer are actually very different. Let’s look at an example: Apple’s Textedit (a text editor) vs. Apple’s Pages (a word processor):
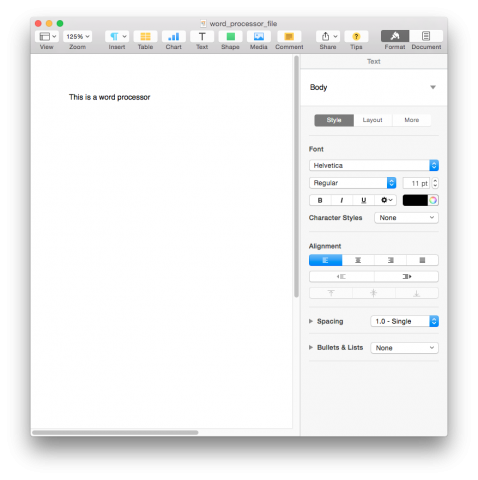
Pages with a simple document
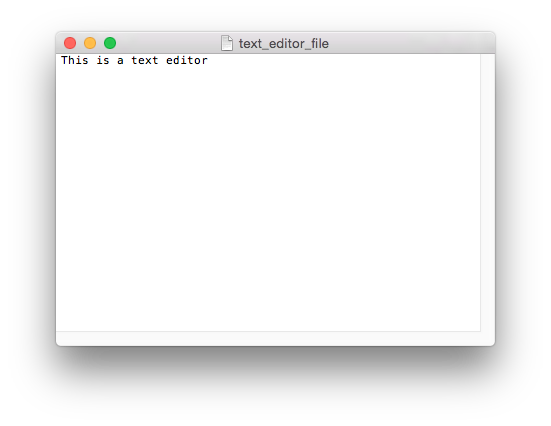
Textedit with a simple document (in plain text mode!)
We immediately see that the text editor is much simpler. It allows us to type on the keyboard and write on the file, and that’s it. The word processor has a lot of other stuff like fonts, text sizes, styles, colors, alignments, etc.
The two files open right now in each of these program look very simple: just a simple sentence without any formatting or extra information. However, they look very different if we look at them closely:

The text file takes only 22 bytes on disk (just the letters forming the sentence), while the word processor file uses a whooping 58 KB (about 2,700 times more) for just about the same content. From the command line we see why:
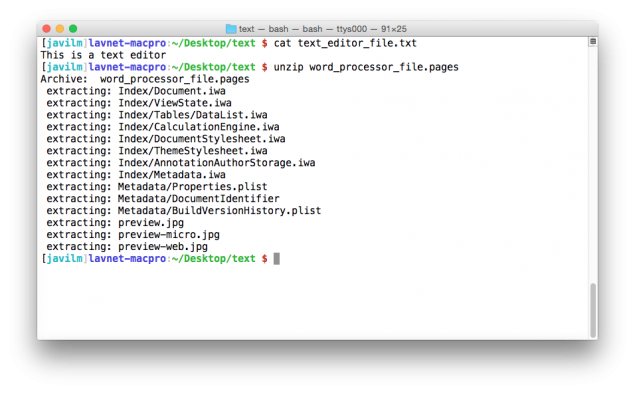
Text file and word processor document
The text file contains just that, text. The word processor document, however, is actually a ZIP archive that contains a lot of stuff that we don’t care about when writing programs, and the computer wouldn’t know what to make with all that data anyway. Because of this we won’t be using a word processor on the MSX (at least not when writing programs), but a text editor.
There are many text editors for MSX out there (APED, TOR, TED, etc). We will use KID/AKID because we already have it (it’s part of MSX-DOS2 TOOLS) and it supports MSX-DOS2 directories nicely.
Differences between KID and AKID
While both of these programs are related, there’s a bunch of differences between them:
- KID supports editing text in Japanese, AKID supports only western characters
- KID can edit up to around 60 KB in size, AKID up to 110 KB
- All operations are generally faster in AKID, because KID runs in a graphics mode and has to move around more data
- AKID doesn’t support Japanese characters in file names
- AKID’s menus an status messages are all in English, KID’s are all in Japanese
From now on I will use AKID to refer to these two editors. When there are differences I will point them out, but I will assume that you’re using AKID.
Creating a test file
Let’s start by making a directory for our tests files and changing to that folder. Then launch AKID without any parameters. Run these commands to create a directory called TMP under A:\, going into that directory, and then launching AKID:
MKDIR A:¥TMP
A:¥
CD ¥TMP
AKID
After entering the AKID command the screen will clear and you’ll see AKID’s copyright notice:
AKID ver 1.00
Copyright (C) 1989 by ASCII Corporation
Immediately before the copyright, AKID will ask you for a file name. This will be the name of our text file on the disk. For now just enter test as the filename and press ENTER.
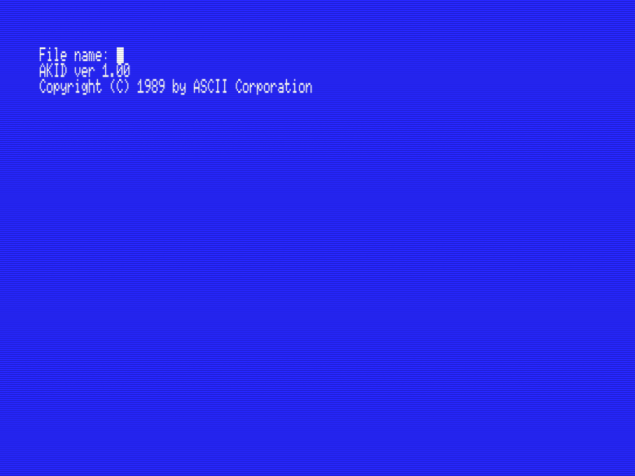
AKID copyright notice and file name prompt
The screen will clear and at this point you can start typing text. Type something simple like This is a test and then press F1 followed by E. This will save the file to the disk and exit AKID. Here’s a video of these steps:
You can also run AKID with a file name in order to open and edit an existing file. For example, to open again the file we just created, run this command:
AKID TEST
This time AKID won’t ask for a file name. It will open the file called TEST and display the contents on the screen. At this point you can add more text and save (F1, then E).
If you give AKID a file name that didn’t exist already then AKID will create a new file with that name.
Menus
AKID has several menus that can be accessed using the function keys F1 through F4. F5 is used too, but for copying and pasting blocks of text. These menus are exactly the same in KID.
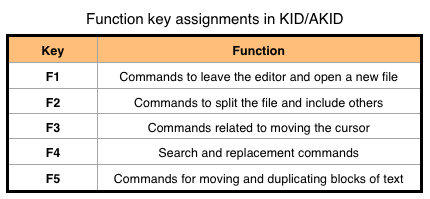
Let’s see them one by one.
F1: Commands to leave the editor and open a new file
![]()
![]()
- E: Save the file currently open in the editor and quit to MSX-DOS2
- Q: Quit to MSX-DOS2 without saving.
- S: Save the file and continue editing.
- N: Save the file and edit a different one. AKID will ask for a new file name.
- A: Discard the current file and open a different one. Again, AKID will ask for a new file name.
- O: Discard all changes to the current file and revert to the last version saved.
All of the commands that would cause data loss (Q, A, O) ask for confirmation if there have been changes to the contents file.
F2: Commands to split the file and include others
![]()
![]()
- I: Read a file from the disk and insert it in the current file at the cursor position.
- W: Write the current file to disk with a different file name.
- Y: Write the contents of the clipboard to a file.
- D: Shows a directory of the files at a given path.
Command W may sound slightly redundant nowadays, but remember that MSX-DOS2 TOOLS was released when most people were still using floppy disks for storage. This command makes sense because you could run out of space easily. 2DD floppy disks held only 713 KB of data. Let’s say that you start working on a new file when your disk is almost full, and that the files in your disk already add up to 700 KB. If you wrote more than 12-13 KB of text then your file won’t fit in the disk (remember that AKID asked for the file name when it started). This command allows you to save the file to a different place: overwriting a different file that you don’t need, or especifying a file name in a different drive.
Command Y takes everything stored on the clipboard (that we will see later in this post) and saves it to a new file in the disk. It will ask for a file name.
Command D asks for a file name. If you give it a path (for example, A:\TMP\ or B:\INCLUDE\) it will list all the files inside that directory. It’s worth mentioning that it won’t show directories. For example, if you ask for the directory of B:\ you will be able to see the several files we created in the previous post, but you won’t be able to see the INCLUDE and LIB directories under B:\.
F3: Commands related to moving the cursor
![]()
![]()
This is a very simple, but very useful menu. You probably will use it often.
- G: Go to an especific line in the file. AKID will ask for a line number.
- T: Move the cursor to the first line of the file.
- B: Move the cursor to the last line of the file.
F4: Search and replacement commands
![]()
![]()
- F: Search forward for a text string and place the cursor over the first match.
- B: Search backwards for a text string and place the cursor over the first match.
- A: Search forward from the current cursor location and automatically replace all matches with a new string.
- R: Same as A, but allows you to confirm each match and decide whether to apply the replacement or skip to the next match.
- S: Enables/disables case sensitivity for searches.
The F and B commands ask for a search string. By default all searches are not case sensitive (this can be changed with the S command.) Commands A and R ask for a replacement string in addition to the search string.
The R command highlights each match it finds and allows you to choose whether to apply the replacement or not. Pressing ENTER applies the replacement, pressing the space key leaves the match unchanged and proceeds to the next match, and the ESC key stops the search and returns to edit mode.
The S command changes the case sensitivity of searches. Space key changes from one state to the other and pressing ENTER applies the change. ESC cancels without changing the value.
Let’s see a video to illustrate all this. I will make a copy of the CURSESC.C file included in the MSX-C Library disk and do a few searches on this file:
In the next post…
Today we’ve seen the KID/AKID menus. In the next post we will see the copy and paste functions and keyboard shortcuts.
This series of articles is supported by your donations. If you’re willing and able to donate, please visit the link below to register a small pledge. Every little amount helps.
Javi Lavandeira’s Patreon page

greetings.,. you sir, you get 10 out of 10 points for your teaching method/pedagogy and I hope you keep this blog going for a long time
Thanks. I guess it’ll keep going for a while, because there’s lots of stuff to talk about.
Pingback: Ностальгия по КУВТ: ретроспектива средств разработки для 8-битных компьютеров MSX. Часть 1 — языки, редакторы, трансляторы | geeks.izula.ru
Thank you very much for this tutorial series! I am following from the begining and can’t stop!
One problem that I am facing: when I press enter at the end of the line, it doesn’t go to next one, but to the end of the current one. What am I doing wrong?
Sorry for the very late answer! Can you please provide more details? Where do you press enter at the end of the line? In the text editor? In some other program?